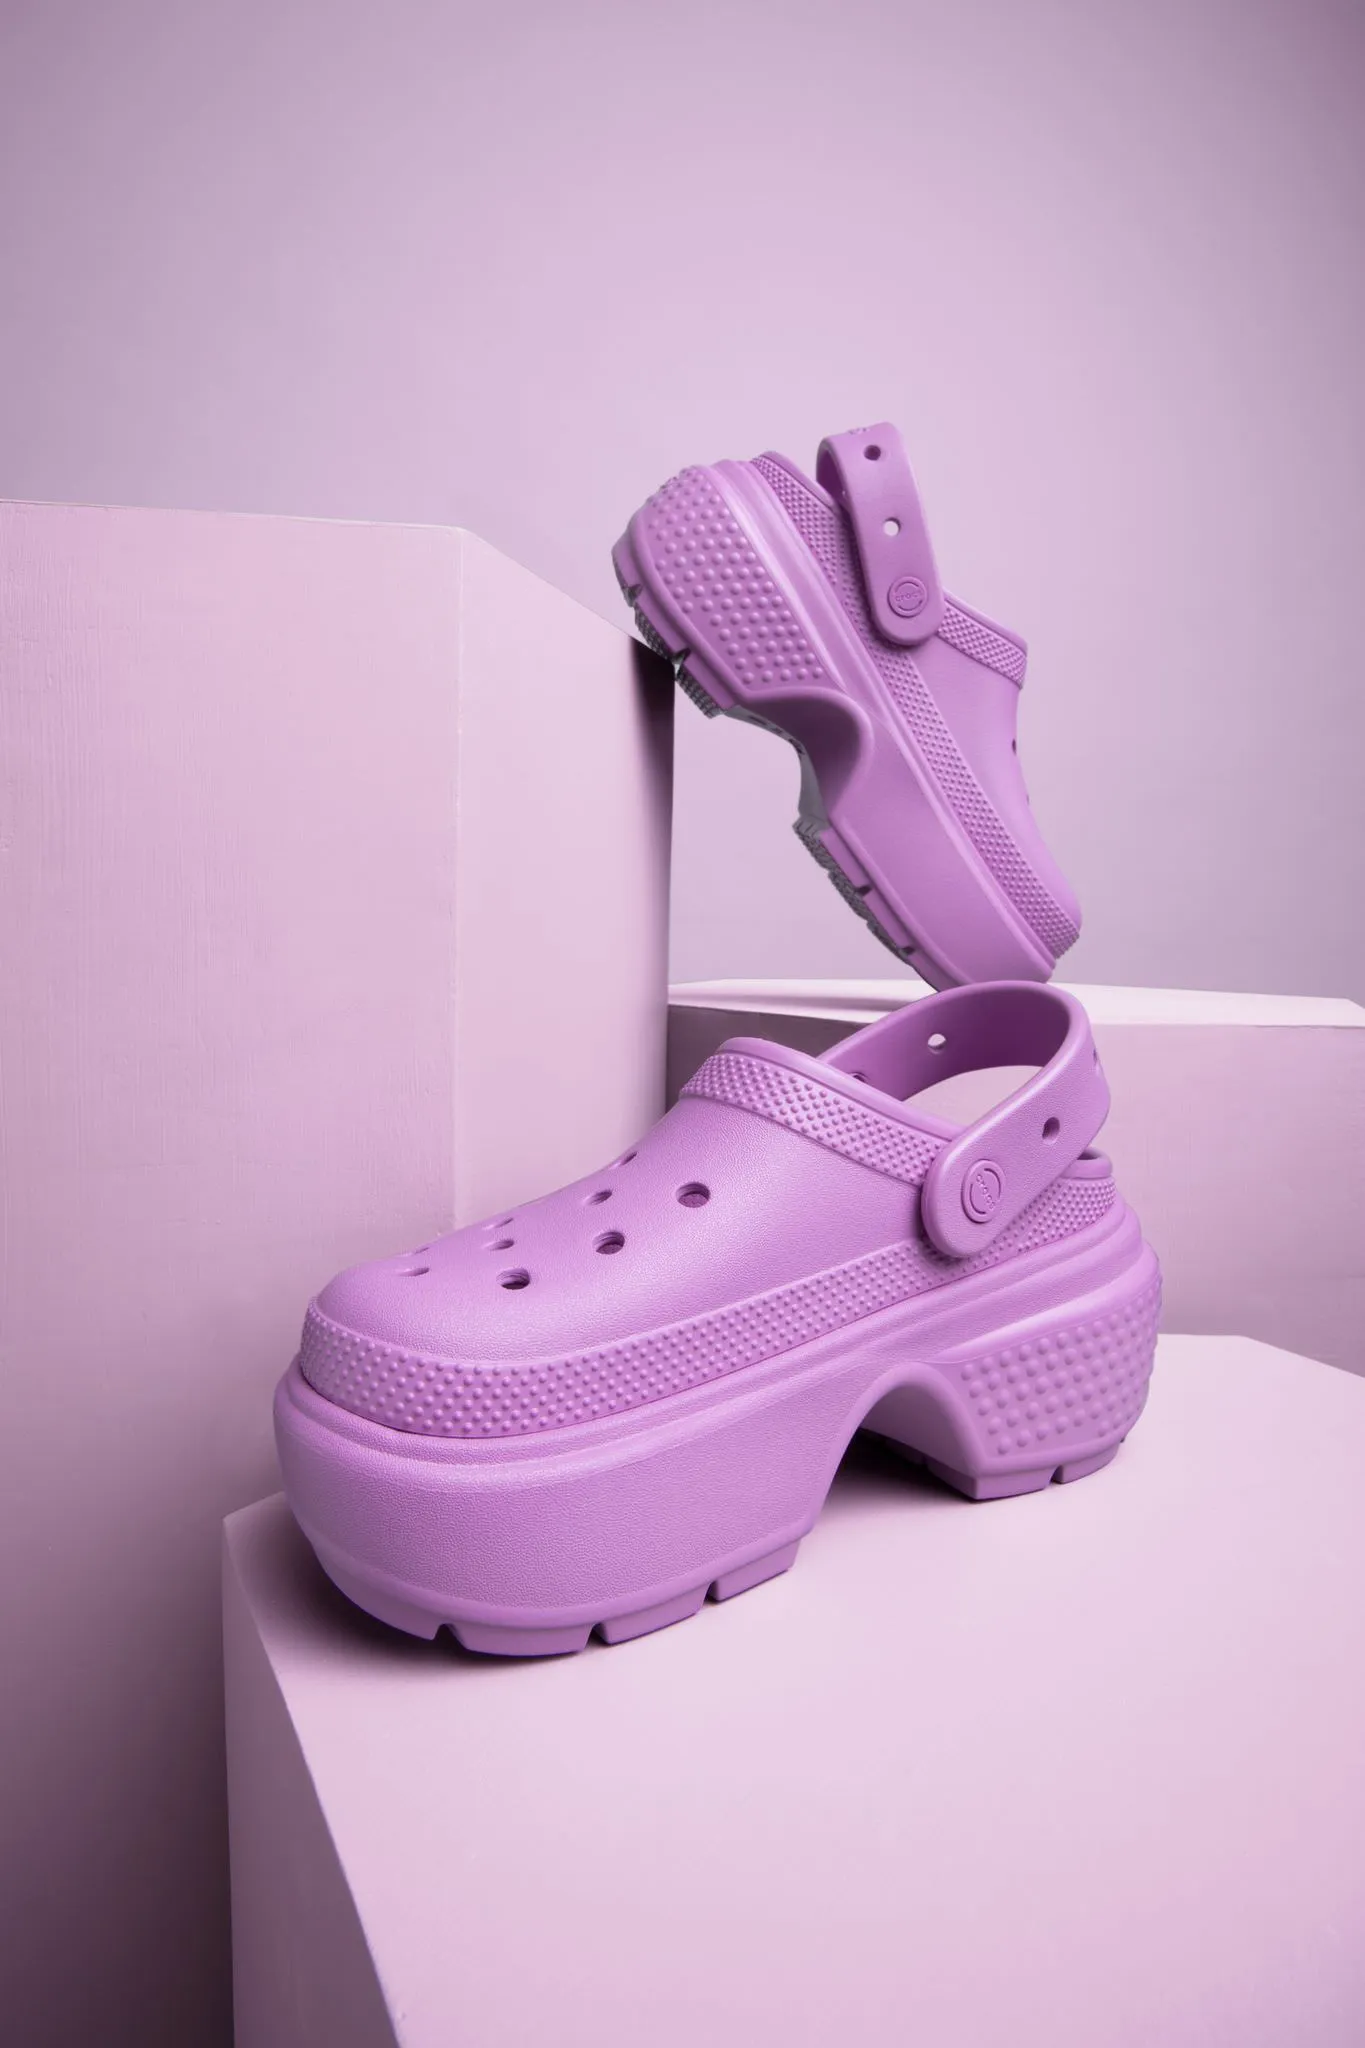


If you have an ecommerce business, chances are you’re familiar with Shopify. It’s a platform that makes building a website and selling your products and services online easy and streamlined. To really make the most out of your Shopify site, you’ll need some awesome product photography..
Consumers make a lot of quick judgments when shopping online. If you don’t impress them or grab their attention, something else will!. So it’s important to make sure your online store offers a seamless and engaging journey for the customer is super important for your conversions. And in our opinion, that starts with product photography.
{{shopify-ad}}
What is Shopify product photography?
Shopify product photography refers to any product visuals you have on your Shopify website. This could include not only listing images like hero shots and supportive photos, but also visuals that appear elsewhere on your site. Shopify product photography can also be in banner images, thumbnails, infographics, and more.

Shopify product photos are important. They communicate the value of your product to potential buyers, taking the place of the in-person experience offered in stores. So visuals essentially are the product.
But don’t fret, it’s not as daunting as it sounds to create high-quality product images.
How to take product photos for Shopify
Unless you’re already a pro photographer, you’ll first need to iron out the basics. The good news? Clear and eye-catching product photos are accessible to anyone with a smartphone, natural lighting, and some creativity.
1. Prep and plan
Preparing before a photoshoot goes a long way in making sure the day goes smoothly. Consider how closely your product photos will be examined by anyone thinking about purchasing. So while an accidental fingerprint on your product package may seem harmless to you, it could look sloppy and distracting to a potential customer. It’s always worth a few extra minutes before and during your shoot to maintain a flawless appearance.

2. Jot down your shot list
Create a shot list that includes every photo you want to capture. Whether you’re checking off boxes as you go through a DIY shoot or you’re sending it to a full service photography studio, your shot list will be a guide to make sure you don’t miss any important shots.
Include any ideas for arrangements and styling of your shoot. Do you want swatches of a makeup product? How about a shirt styled tucked-in vs. out? If you're doing group shots, which products do you want in the forefront? Every little detail should be documented either to help you guide a DIY shoot or to advise professionals hired to take the photos for you.
If you want photos for your product page as well as photos for your social media feed, your shot list might look like this.
- Product 1 on white background
- Product 2 on white background
- Products 1 and 2 together flat lay
- Product 1 with hand model
- Product 2 with hand model
- etc.
3. Get lighting on point 💡
Both natural light and artificial light have their advantages. Consider what your setting and mood should be for your ecomm photos—and your budget for equipment—to make the best decision about which type of lighting you should use.
Natural lighting
Natural lighting is best—it’s free, romantic, and gives photos a natural glow–but it’s also fickle. If you’re shooting indoors, you’ll need time to set up your shoot near a well-lit window before the prime lighting happens. This can give you a bit of a time constraint.
When shooting outdoors (often with things like lifestyle photos), you’re chasing that fleeting few minutes of golden hour or blue hour. Outdoor sunlight can be really harsh in photos if the timing isn’t right.
Artificial lighting
Artificial lighting can obviously be more costly, but it offers you more control. They’re dynamic, can change colors, and can create moving shadows for animated GIFs. You can shoot a brightly lit scene in the middle of the night with the right equipment. Just one bright light won’t necessarily suffice, that would actually cast harsh shadows on the backside of your product. So when purchasing artificial studio lights, you'll want to grab a few.
It can also be time consuming to move lighting around and take test shots to find the best combination for your vision. But for a lot of products or a long shoot, it might be worth the investment.
4. Select your background/setting
Now it’s time to consider what backgrounds you want to shoot! The possibilities are infinite, but here’s a quick list of product photography background ideas to try:
- White background
- Gradient background
- Color blocking
- Outdoor shoot
- Skin (for close-ups)

5. Arrange your products
With Shopify, you’ve got total creative freedom with how products are arranged. Here are some ideas for inspiration.
- Line up color options in rainbow order
- Have a model throwing various products in the air
- Create a flat lay with multiple related products
- A shelfie
- A lifestyle shoot with a “what’s in her bag” theme
Make sure to check the whole frame, not just the products themselves.
Be on the lookout for imperfections. A lint roller and/or a microfiber cloth work wonders for quickly removing dust, spots, or smudges. Handle your products with gloves if they’re easily smudged. And consider bringing or sending two of each product if you want to make sure you have all your bases covered.
These tips don’t just apply to your products! Also closely examine any props or backgrounds for blemishes to save yourself time editing later.
And if you’re hiring models, make sure they’re clear on your expectations for appearance. Should their nails be unpainted? Should their hair be up or down? If you have a vision, communicate it beforehand!
Book a model in just a click! Only pay a one-time fee & use your content forever >
Using props
For many product pages: you’ll want a plain product-on-white shot—no props or colorful backgrounds needed. But you may want to consolidate your photo shoots and achieve multiple sets at once.
Do you want a few lifestyle photos with a palm leaf casting a moody shadow on your background for your hero image? How about the upcoming holiday, do you need some seasonal social media content? Get your props sorted out so either you or your stylist can prop shop beforehand.

6. Shoot every angle
Your product page should get as close to IRL as possible. How will you achieve this? Photos from multiple angles, on models, using GIFs of your product in action, etc. You might even include other types of product content to give shoppers a complete view. Product infographics, 360-degree photos, and even product videos, for example, can give shoppers a look from every perspective.
7. Upload strategically
Now you’ve got your photos edited and ready to share. But what’s your strategy? For PDP product photos, go ahead and upload as many as you’d like as quickly as you can. These can only add more information for your customers. Just make sure you reduce the file size first so the page doesn’t take too long to load, which can hurt the user experience and your SEO. You’ll also want to make sure you’re using Shopify’s approved image size guidelines.
You'll also want to include image optimizations like file names and alt text that are descriptive and include related keywords.
Alt image tags are used for accessibility and search purposes. If someone is visually impaired, use the alt text to communicate anything you want to make sure they know about the image. Your alt img tag should actually describe the photo it’s attached to in simple and thorough terms while incorporating commonly searched keywords that pertain to your photo. In other words: keywords are good but buzzwords are bad.
Your photos don’t have to live only on Shopify though! In fact, you should repurpose those visual assets for uses on other platforms and channels. For example, you can put them on different backgrounds to create themed website banner images. Or perhaps you turn them into animated GIFs for email. Even further, you can turn professional product photos into paid ads for social or search.
Hiring a photography studio
When it comes to hiring creatives to shoot your product photos for you, you’ve got options. Some services allow you to hire a photographer “freelance style” who will come to your location or who already has a studio. These photographers vary greatly in price based on demand, availability, and experience. Typically, you’ll have an exchange with them before booking where they’ll lay out their requirements.
Another option is to work with a studio of creatives virtually. This means booking a shoot and shipping your products to the studio where they’ll be photographed by experts.
{{studio-ad}}
Whether you’re in-person or virtual for your shoot: here’s a list of things you’ll definitely want to have prepared before the shoot begins.
Shot list
A shot list is exactly what it sounds like: a list of every shot you want to make sure to capture. Make sure to include every little detail here.
Mood board
This is super helpful for any creatives working with you on your shoot because they’ll get an idea of your brand identity. A mood board should involve signature brand colors and overall vibe—think about adding images you’re inspired by that aren’t necessarily from your own brand.
Point of contact
If you’ve got more than one person on your team: you’ll want to establish a person of contact for any shoots. This is because questions can come up mid-shoot that need to be answered promptly. Having a designated point of contact to make executive decisions and help advise the shoot can make it a smoother ride and result in more satisfactory images.
Sample products
These are your best-of-the-best products free of any fingerprints or flaws, prepare them the way you’ll want your customers to see them in a high-resolution photo. It’s a good idea to send two of each product if you’re planning on getting some photos of the packaging and some of the product-in-use.
Shopify image requirements and guidelines
When shooting Shopify product photos, you’ll want to bear in mind its specific image specifications:
File name
Your images folder might be full of names like “IMG_179585”. but when uploading to Shopify: you’ll want to name your photo specifically. think: what would I type into Google to find an image like this? and there’s a name! for example: “baby onesie pink stripes white background”. you don’t want to name your image with subjective words like “big sale adorable baby onesie”.
File format
Most Shopify images will fall into one of three image formats:
- GIFs
- JPEGs
- PNGs
Apps to manage Shopify product imagery
Below are some tools we recommend adding to your arsenal for managing Shopify product assets:
- Avada: Avada is useful for SEO (search engine optimization). The app allows you to find the best keywords to include in file names and descriptions to boost your website on Google searches.
- Easy Alt Text: This app is a shortcut for creating alt-text for your images. It’s a major time-saver!
- Listing Insights: The first visual optimization tool built for Amazon and Shopify to analyze and measure the creative assets of your product content.
- TinyIMG: TinyIMG allows you to compress images without losing quality.
Shopify product photography tips and best practices
Now that we’ve covered photoshoot prep and technical specs for Shopify image uploading, let’s start shooting. Below are best practices for ecommerce photography.
Get equipped
Modern smartphones make great photography accessible to anyone. In a pinch (and used along with these other best practices) an iPhone camera can achieve decent high-quality images. However, if you want to level up, there are ways you can equip yourself with great photography equipment on any budget.
- DSLR camera (Nikon and Canon are two reliable competitors with great DSLR options)
- Lighting umbrella
- Backdrop
- Tripod
- Turntable (one that matches your aesthetic or a clear polycarbonate turntable so it doesn’t appear in photos)
Focus on your product
Product photography is more than just point-and-shoot. There are some camera settings to consider depending on the size and type of product you’re capturing. Adjust settings to ensure your product is in focus and the background is slightly out of focus to really make your product pop.
Be different and get creative
A creative photoshoot doesn’t mean it’s never been done before. Taking inspiration from other images and making them your own is a great way to get creative inspiration.
For example, if you have a skincare brand, you can check out the IG feed of brands like Supergoop! with its bright & contrasted colors and natural faces or Glossier with more neutral and rosy tones and “messy” flat lays or Aesop’s industrial organic shapes and moody shadows.
These are all well-established skincare brands, but it’s okay for you to choose one of those “vibes” and put a unique twist on it. Take what you think informs your own brand identity, and leave the rest.
At this step in gathering inspiration, you should be building a mood board on an app like Pinterest or Canva to keep track of your inspiration and direction.
Consider models
Models make product visuals relatable. Ecommerce customers are looking for a buying experience as close to IRL as they can get without being in a store. This means they want close-ups of fabric and functionality—and they also want to be able to picture themselves owning that product.
If you sell apparel, it’s pretty easy to understand why you’d want to show it on a model. Many apparel companies will even include details like “model is 5’6” wearing a size small” for context.
But imagine you’re selling something like a mug. It’s not wearable, so why spend more money to hire a model? The presence of a model or even just human hands holding a product can increase sales and trust and also offer a point of reference for scale.
It’s worth paying a model or two to humanize your business. Book models that reflect your target customer demographic so customers can see themselves belonging to the lifestyle your product provides.
Book a model in just a click! Only pay a one-time fee & use your content forever >
Incorporate alternative image types
While you want to be thorough and make sure you have multiple angles of still images for your product pages, you also might consider some GIFs, 360-degree photos, or even videos of your products. You might be able to knock it all out in one shoot or it may take a few different shoots (with different equipment) to achieve all your goals.
For example, a video on your product page may be a simple 360-spin on a white background just to show all facets of your product. but an ad on social media might be more of a lifestyle shoot set in a living room with models.
Don’t skip editing
Now that you’ve got all your photos captured, you’re working with a pile of raw images. Raw images are usually not ready to publish yet—your photos probably need some edits. Luckily, there are simple photo-editing apps to make this easy, and professional photo-editing studios to make it even easier.
Here are some things to consider during edits:
- Fingerprints on packaging
- Reflection of camera in shiny objects
- Harsh shadows
- Orange-y lighting
- Distracting wrinkles in your backdrop
- Fun animations to add to your photos
Scale your high-quality Shopify product content with soona
If you're ready to collaborate with creative photographers and stylists for the Shopify product photography of your dreams, head to soona to kick start your store with our Shopify launch pack.
{{shopify-ad}}
Shopify photography FAQs
How to photograph products for Shopify?
- Prep and plan
- Jot down your shot list
- Get lighting on point
- Select your background/setting
- Arrange your products
- Shoot every angle
- Upload strategically
How do I add product photos on Shopify?
Log in to your Shopify admin and go to Products>Allproducts. Select the product that you want to add a photo for. In the Media section, upload your photos. Then choose the image(s) you want to add to your product.
If you have an ecommerce business, chances are you’re familiar with Shopify. It’s a platform that makes building a website and selling your products and services online easy and streamlined. To really make the most out of your Shopify site, you’ll need some awesome product photography..
Consumers make a lot of quick judgments when shopping online. If you don’t impress them or grab their attention, something else will!. So it’s important to make sure your online store offers a seamless and engaging journey for the customer is super important for your conversions. And in our opinion, that starts with product photography.
{{shopify-ad}}
What is Shopify product photography?
Shopify product photography refers to any product visuals you have on your Shopify website. This could include not only listing images like hero shots and supportive photos, but also visuals that appear elsewhere on your site. Shopify product photography can also be in banner images, thumbnails, infographics, and more.
Shopify product photos are important. They communicate the value of your product to potential buyers, taking the place of the in-person experience offered in stores. So visuals essentially are the product.
But don’t fret, it’s not as daunting as it sounds to create high-quality product images.
How to take product photos for Shopify
Unless you’re already a pro photographer, you’ll first need to iron out the basics. The good news? Clear and eye-catching product photos are accessible to anyone with a smartphone, natural lighting, and some creativity.
1. Prep and plan
Preparing before a photoshoot goes a long way in making sure the day goes smoothly. Consider how closely your product photos will be examined by anyone thinking about purchasing. So while an accidental fingerprint on your product package may seem harmless to you, it could look sloppy and distracting to a potential customer. It’s always worth a few extra minutes before and during your shoot to maintain a flawless appearance.
2. Jot down your shot list
Create a shot list that includes every photo you want to capture. Whether you’re checking off boxes as you go through a DIY shoot or you’re sending it to a full service photography studio, your shot list will be a guide to make sure you don’t miss any important shots.
Include any ideas for arrangements and styling of your shoot. Do you want swatches of a makeup product? How about a shirt styled tucked-in vs. out? If you're doing group shots, which products do you want in the forefront? Every little detail should be documented either to help you guide a DIY shoot or to advise professionals hired to take the photos for you.
If you want photos for your product page as well as photos for your social media feed, your shot list might look like this.
- Product 1 on white background
- Product 2 on white background
- Products 1 and 2 together flat lay
- Product 1 with hand model
- Product 2 with hand model
- etc.
3. Get lighting on point 💡
Both natural light and artificial light have their advantages. Consider what your setting and mood should be for your ecomm photos—and your budget for equipment—to make the best decision about which type of lighting you should use.
Natural lighting
Natural lighting is best—it’s free, romantic, and gives photos a natural glow–but it’s also fickle. If you’re shooting indoors, you’ll need time to set up your shoot near a well-lit window before the prime lighting happens. This can give you a bit of a time constraint.
When shooting outdoors (often with things like lifestyle photos), you’re chasing that fleeting few minutes of golden hour or blue hour. Outdoor sunlight can be really harsh in photos if the timing isn’t right.
Artificial lighting
Artificial lighting can obviously be more costly, but it offers you more control. They’re dynamic, can change colors, and can create moving shadows for animated GIFs. You can shoot a brightly lit scene in the middle of the night with the right equipment. Just one bright light won’t necessarily suffice, that would actually cast harsh shadows on the backside of your product. So when purchasing artificial studio lights, you'll want to grab a few.
It can also be time consuming to move lighting around and take test shots to find the best combination for your vision. But for a lot of products or a long shoot, it might be worth the investment.
4. Select your background/setting
Now it’s time to consider what backgrounds you want to shoot! The possibilities are infinite, but here’s a quick list of product photography background ideas to try:
- White background
- Gradient background
- Color blocking
- Outdoor shoot
- Skin (for close-ups)
5. Arrange your products
With Shopify, you’ve got total creative freedom with how products are arranged. Here are some ideas for inspiration.
- Line up color options in rainbow order
- Have a model throwing various products in the air
- Create a flat lay with multiple related products
- A shelfie
- A lifestyle shoot with a “what’s in her bag” theme
Make sure to check the whole frame, not just the products themselves.
Be on the lookout for imperfections. A lint roller and/or a microfiber cloth work wonders for quickly removing dust, spots, or smudges. Handle your products with gloves if they’re easily smudged. And consider bringing or sending two of each product if you want to make sure you have all your bases covered.
These tips don’t just apply to your products! Also closely examine any props or backgrounds for blemishes to save yourself time editing later.
And if you’re hiring models, make sure they’re clear on your expectations for appearance. Should their nails be unpainted? Should their hair be up or down? If you have a vision, communicate it beforehand!
Book a model in just a click! Only pay a one-time fee & use your content forever >
Using props
For many product pages: you’ll want a plain product-on-white shot—no props or colorful backgrounds needed. But you may want to consolidate your photo shoots and achieve multiple sets at once.
Do you want a few lifestyle photos with a palm leaf casting a moody shadow on your background for your hero image? How about the upcoming holiday, do you need some seasonal social media content? Get your props sorted out so either you or your stylist can prop shop beforehand.
6. Shoot every angle
Your product page should get as close to IRL as possible. How will you achieve this? Photos from multiple angles, on models, using GIFs of your product in action, etc. You might even include other types of product content to give shoppers a complete view. Product infographics, 360-degree photos, and even product videos, for example, can give shoppers a look from every perspective.
7. Upload strategically
Now you’ve got your photos edited and ready to share. But what’s your strategy? For PDP product photos, go ahead and upload as many as you’d like as quickly as you can. These can only add more information for your customers. Just make sure you reduce the file size first so the page doesn’t take too long to load, which can hurt the user experience and your SEO. You’ll also want to make sure you’re using Shopify’s approved image size guidelines.
You'll also want to include image optimizations like file names and alt text that are descriptive and include related keywords.
Alt image tags are used for accessibility and search purposes. If someone is visually impaired, use the alt text to communicate anything you want to make sure they know about the image. Your alt img tag should actually describe the photo it’s attached to in simple and thorough terms while incorporating commonly searched keywords that pertain to your photo. In other words: keywords are good but buzzwords are bad.
Your photos don’t have to live only on Shopify though! In fact, you should repurpose those visual assets for uses on other platforms and channels. For example, you can put them on different backgrounds to create themed website banner images. Or perhaps you turn them into animated GIFs for email. Even further, you can turn professional product photos into paid ads for social or search.
Hiring a photography studio
When it comes to hiring creatives to shoot your product photos for you, you’ve got options. Some services allow you to hire a photographer “freelance style” who will come to your location or who already has a studio. These photographers vary greatly in price based on demand, availability, and experience. Typically, you’ll have an exchange with them before booking where they’ll lay out their requirements.
Another option is to work with a studio of creatives virtually. This means booking a shoot and shipping your products to the studio where they’ll be photographed by experts.
{{studio-ad}}
Whether you’re in-person or virtual for your shoot: here’s a list of things you’ll definitely want to have prepared before the shoot begins.
Shot list
A shot list is exactly what it sounds like: a list of every shot you want to make sure to capture. Make sure to include every little detail here.
Mood board
This is super helpful for any creatives working with you on your shoot because they’ll get an idea of your brand identity. A mood board should involve signature brand colors and overall vibe—think about adding images you’re inspired by that aren’t necessarily from your own brand.
Point of contact
If you’ve got more than one person on your team: you’ll want to establish a person of contact for any shoots. This is because questions can come up mid-shoot that need to be answered promptly. Having a designated point of contact to make executive decisions and help advise the shoot can make it a smoother ride and result in more satisfactory images.
Sample products
These are your best-of-the-best products free of any fingerprints or flaws, prepare them the way you’ll want your customers to see them in a high-resolution photo. It’s a good idea to send two of each product if you’re planning on getting some photos of the packaging and some of the product-in-use.
Shopify image requirements and guidelines
When shooting Shopify product photos, you’ll want to bear in mind its specific image specifications:
File name
Your images folder might be full of names like “IMG_179585”. but when uploading to Shopify: you’ll want to name your photo specifically. think: what would I type into Google to find an image like this? and there’s a name! for example: “baby onesie pink stripes white background”. you don’t want to name your image with subjective words like “big sale adorable baby onesie”.
File format
Most Shopify images will fall into one of three image formats:
- GIFs
- JPEGs
- PNGs
Apps to manage Shopify product imagery
Below are some tools we recommend adding to your arsenal for managing Shopify product assets:
- Avada: Avada is useful for SEO (search engine optimization). The app allows you to find the best keywords to include in file names and descriptions to boost your website on Google searches.
- Easy Alt Text: This app is a shortcut for creating alt-text for your images. It’s a major time-saver!
- Listing Insights: The first visual optimization tool built for Amazon and Shopify to analyze and measure the creative assets of your product content.
- TinyIMG: TinyIMG allows you to compress images without losing quality.
Shopify product photography tips and best practices
Now that we’ve covered photoshoot prep and technical specs for Shopify image uploading, let’s start shooting. Below are best practices for ecommerce photography.
Get equipped
Modern smartphones make great photography accessible to anyone. In a pinch (and used along with these other best practices) an iPhone camera can achieve decent high-quality images. However, if you want to level up, there are ways you can equip yourself with great photography equipment on any budget.
- DSLR camera (Nikon and Canon are two reliable competitors with great DSLR options)
- Lighting umbrella
- Backdrop
- Tripod
- Turntable (one that matches your aesthetic or a clear polycarbonate turntable so it doesn’t appear in photos)
Focus on your product
Product photography is more than just point-and-shoot. There are some camera settings to consider depending on the size and type of product you’re capturing. Adjust settings to ensure your product is in focus and the background is slightly out of focus to really make your product pop.
Be different and get creative
A creative photoshoot doesn’t mean it’s never been done before. Taking inspiration from other images and making them your own is a great way to get creative inspiration.
For example, if you have a skincare brand, you can check out the IG feed of brands like Supergoop! with its bright & contrasted colors and natural faces or Glossier with more neutral and rosy tones and “messy” flat lays or Aesop’s industrial organic shapes and moody shadows.
These are all well-established skincare brands, but it’s okay for you to choose one of those “vibes” and put a unique twist on it. Take what you think informs your own brand identity, and leave the rest.
At this step in gathering inspiration, you should be building a mood board on an app like Pinterest or Canva to keep track of your inspiration and direction.
Consider models
Models make product visuals relatable. Ecommerce customers are looking for a buying experience as close to IRL as they can get without being in a store. This means they want close-ups of fabric and functionality—and they also want to be able to picture themselves owning that product.
If you sell apparel, it’s pretty easy to understand why you’d want to show it on a model. Many apparel companies will even include details like “model is 5’6” wearing a size small” for context.
But imagine you’re selling something like a mug. It’s not wearable, so why spend more money to hire a model? The presence of a model or even just human hands holding a product can increase sales and trust and also offer a point of reference for scale.
It’s worth paying a model or two to humanize your business. Book models that reflect your target customer demographic so customers can see themselves belonging to the lifestyle your product provides.
Book a model in just a click! Only pay a one-time fee & use your content forever >
Incorporate alternative image types
While you want to be thorough and make sure you have multiple angles of still images for your product pages, you also might consider some GIFs, 360-degree photos, or even videos of your products. You might be able to knock it all out in one shoot or it may take a few different shoots (with different equipment) to achieve all your goals.
For example, a video on your product page may be a simple 360-spin on a white background just to show all facets of your product. but an ad on social media might be more of a lifestyle shoot set in a living room with models.
Don’t skip editing
Now that you’ve got all your photos captured, you’re working with a pile of raw images. Raw images are usually not ready to publish yet—your photos probably need some edits. Luckily, there are simple photo-editing apps to make this easy, and professional photo-editing studios to make it even easier.
Here are some things to consider during edits:
- Fingerprints on packaging
- Reflection of camera in shiny objects
- Harsh shadows
- Orange-y lighting
- Distracting wrinkles in your backdrop
- Fun animations to add to your photos
Scale your high-quality Shopify product content with soona
If you're ready to collaborate with creative photographers and stylists for the Shopify product photography of your dreams, head to soona to kick start your store with our Shopify launch pack.
{{shopify-ad}}
Shopify photography FAQs
How to photograph products for Shopify?
- Prep and plan
- Jot down your shot list
- Get lighting on point
- Select your background/setting
- Arrange your products
- Shoot every angle
- Upload strategically
How do I add product photos on Shopify?
Log in to your Shopify admin and go to Products>Allproducts. Select the product that you want to add a photo for. In the Media section, upload your photos. Then choose the image(s) you want to add to your product.