product preparation is critical
picture this: you have a big presentation where you want - no… need - to convince someone of your brilliant idea. it’s critical that the group you are presenting to really believes in your idea - your livelihood might even depend on it. do you go into that meeting unprepared and just wing it? of course you don’t! you invest time in your strategy and preparation and really think about how you want to present your genius idea - right? it’s the same concept when preparing for your ecomm photoshoot. you are getting this fresh high-quality content to present to potential customers with the hopes these potential customers are convinced they cannot live without your product. photoshoot prep is an essential part of creating content that will lead to conversions. you need a plan. you need to prepare. the rest will fall into place. taking the time to prep your products - no matter what industry you are in - will lead to saving time. saving money. better quality content. and consistency to boot.

how you can save time
showing up to any photoshoot without proper prep is a big no-no. it will lead you and the photographer feeling frustrated. by taking the time to plan your shoot and prep your products you’ll save yourself headache and money. let’s look at a worst-case scenario: you have a line of shirts that you’re selling. you show up to your shoot with your shirts you threw into a bag a couple of weeks ago. you remove them at the shoot only to find they are all wrinkled. some have water stains. and one has a small tear. now what? your products - no matter how awesome they are - are in no condition to be photographed. your photographer knows that the condition of your products are beyond anything that could be remedied in photoshop during post-production. they refuse to do the shoot and ask you to reschedule. you’ll have to find another day they are free - which could be weeks or months! - and block off another few hours for your photoshoot. plus any time you need to make sure your items are prepped and ready this time.if you’d just taken a few days to check your inventory and get your products in picture-perfect condition - you’d already have your edited images back!
how you can save money
let’s play out this shirt scenario another way: you show up to your shoot with your bag of shirts. your bestseller has a small stain but otherwise the rest of your shirts are just wrinkled. the photographer is willing to do the shoot but they charge you extra to have an assistant join the shoot to steam the shirts. and that labor will cost you. the stain is on a solid-colored shirt and it's small so it should only take a little extra photo editing magic to remove it - an additional cost.maybe these are small additional fees. or maybe the photographer realizes they can’t edit out the stain as easily as they thought and they need you to come back in to shoot that shirt which requires an additional fee for their time and effort.
{{studio-ad}}
produce higher quality product images
this is a no-brainer. the better your product looks - the better your product photos are going to look. the camera will capture all the amazing and beautiful features of your product. it’ll also capture any defects no matter how small. just like you want to present your best self when having your picture taken - so does your product! it wants to look beautiful under those studio lights and be ready for its close up.💡 check out how beauty brands can highlight the details when shooting high-quality product photos.
create consistent content
you want to present your product as consistently as possible. with consistency comes trust. according to a 2019 Edleman report: 81% of consumers said they need to trust the brand before they can purchase from them. an easy way to break earned trust (or prevent trust from ever being established) is having content that seemingly shows your product looking different photo-to-photo or platform-to-platform. your content should be cohesive - from your website to your social media to your emails. customers shouldn’t have to wonder which is the more accurate representation of your product. having a product prep process for shoots will automatically lend itself to your products having a consistent appearance.
what you need to prep products before a photoshoot
before your first (or next) photoshoot we recommend creating a photoshoot checklist and/or toolkit. your basis for needing new content may vary but the process of which you go about prepping your products and preparing for your shoot should remain largely unchanged. having a plan of attack. understanding your basic photoshoot needs. and knowing what additional services you want will help you have a stress-free & on-budget photoshoot every. single. time.
create a photoshoot plan of attack
this is one of the most important steps to feeling properly prepared for your product photoshoot. you need to establish your foundation for you can plan anything else. you might miss opportunities if you don't answer these questions for yourself before your shoot. when you're on a live photoshoot and trying to decide goals - you won't be as successful:
- why do I need to book a photoshoot?
- what are the goals of this photoshoot?
- what type of content do I need? flat lay? lifestyle? video?
- do I need photo and video?
- is there a primary location this content is going to live? (think: Amazon has specific requirements you don’t have to follow for social media or Shopify.)
- how many products do I need shots of?
- are they all individual shots? are they group shots? or is it a mix?
- do you need any special props?
- do you need a model? what about a stylist? (stylists are often necessary for complex food shoots. shoots with apparel. or if there are props to style.)
- are there specific colors you want used? (Amazon requires white backgrounds but you can mix it up on your own channels!)
once you’ve answered these questions you should have a pretty solid understanding of what you really need to get out of your shoot which will help you determine whether you need an individual/freelance photographer or full photography service.
create a shotlist
having a general vision of what you want your images to look like is key. you can communicate this easily to your photographer by creating a shotlist. this is just a simple list with basic instructions - don’t worry if you’re not a creative genius! creating a shotlist allows you to describe any inspiration images you want to try to replicate. the more specific you can be - the better! This is the place to list out any preferences on colors (ex: always use pink. or never use pink). lighting. close ups. depth of field adjustments. or different angles.something like this is a great starting point:environment: backdropbackdrop color: light bluelighting: soft/ natural lightangle: overheadprops: mirror and white flowers. description: product is laying on a mirror surrounded by white flowers. light blue backdrop.a shot list helps you create efficiencies in your shoot. you can organize your shoot plan by angle and product type to avoid changing the setup too often.
book additional services
depending on whether you choose to work with an independent photographer or a full service photography company will determine how much work you need to put into sourcing additional services for your shoot. since you created a stellar plan of attack at the beginning of this process - you’ve budgeted and are ready to find the team that’ll make your product shine.every service you need generally comes with another person to pay. those fees can vary depending on how long your shoot is and what the ask is (ex: a stylist may cost more than a hand model). most independent photographers have a resource list for models. stylists. and hair & makeup artists. some photographers will book those services for you based on guidelines you provide them (for an additional fee of course). others require you to source and coordinate your own services which can take time and resources you may or may not have.full service photography studios are just that: full service. those studios have a large roster of professionals they’ve worked with for a flat fee. they also can offer additional services like prop shopping if needed.
how to prepare every time of product for a photoshoot
the steps to making sure your product is prepared can vary depending on your product type and the type of content you are shooting. here's a break down of a few common product types:
clothing
take these steps to ensure your apparel is ready for action:
- collect items in the right size. if you are using a model then you need to bring prepped items that are in that model’s size. but if you are looking to shoot flat lay or mannequin shots only: bring the smallest size you carry. the smaller the size - the easier it is to manipulate and style it within the frame.
- gather duplicates. it’s important to bring at least two of everything. you never know what might happen so a backup is always a great idea.
- inspect. thoroughly check over every item you are taking to the shoot. make sure the product and its backup are stain-free. tear-free. and defect-free.
- steam/iron. this is an important step to creating a super polished look. there shouldn’t be a wrinkle in sight. this is a great step to have your stylist do. remember to bring pins and tape for on-model shots and flat lays.
- bring a lint roller. before the camera starts clicking: give your items a quick once-over with a lint roller to collect any stray threads. hairs. or dust particles.

jewelry
take these steps to make sure your jewels are ready to shine:
- collect your items. gather every item you want to shoot and group them in a way that makes sense to you and your photoshoot plans. maybe you want to group all earrings together or you have earring & necklace sets you want to capture together.
- gather duplicates. make sure you bring multiples of each piece - especially with jewelry. you never know when you might lose a stone or an earring!
- inspect. really look over every piece you want to shoot. make sure you’re not missing any stones or there aren’t other defects the camera will pick up.
- polish. get your items looking shiny and beautiful by giving them a good clean.
- repeat 1-4 boxes or other packaging. your boxing should be just as camera-ready as the goodies it holds inside!
- handle with gloves. after you’ve cleaned your boxes/packaging & jewelry - only handle them with lint-free gloves. This will maintain the cleanliness you just worked so hard on and avoid your items being riddled with fingerprints.

food/beverage
take these steps to make sure your food & beverage products look delicious:
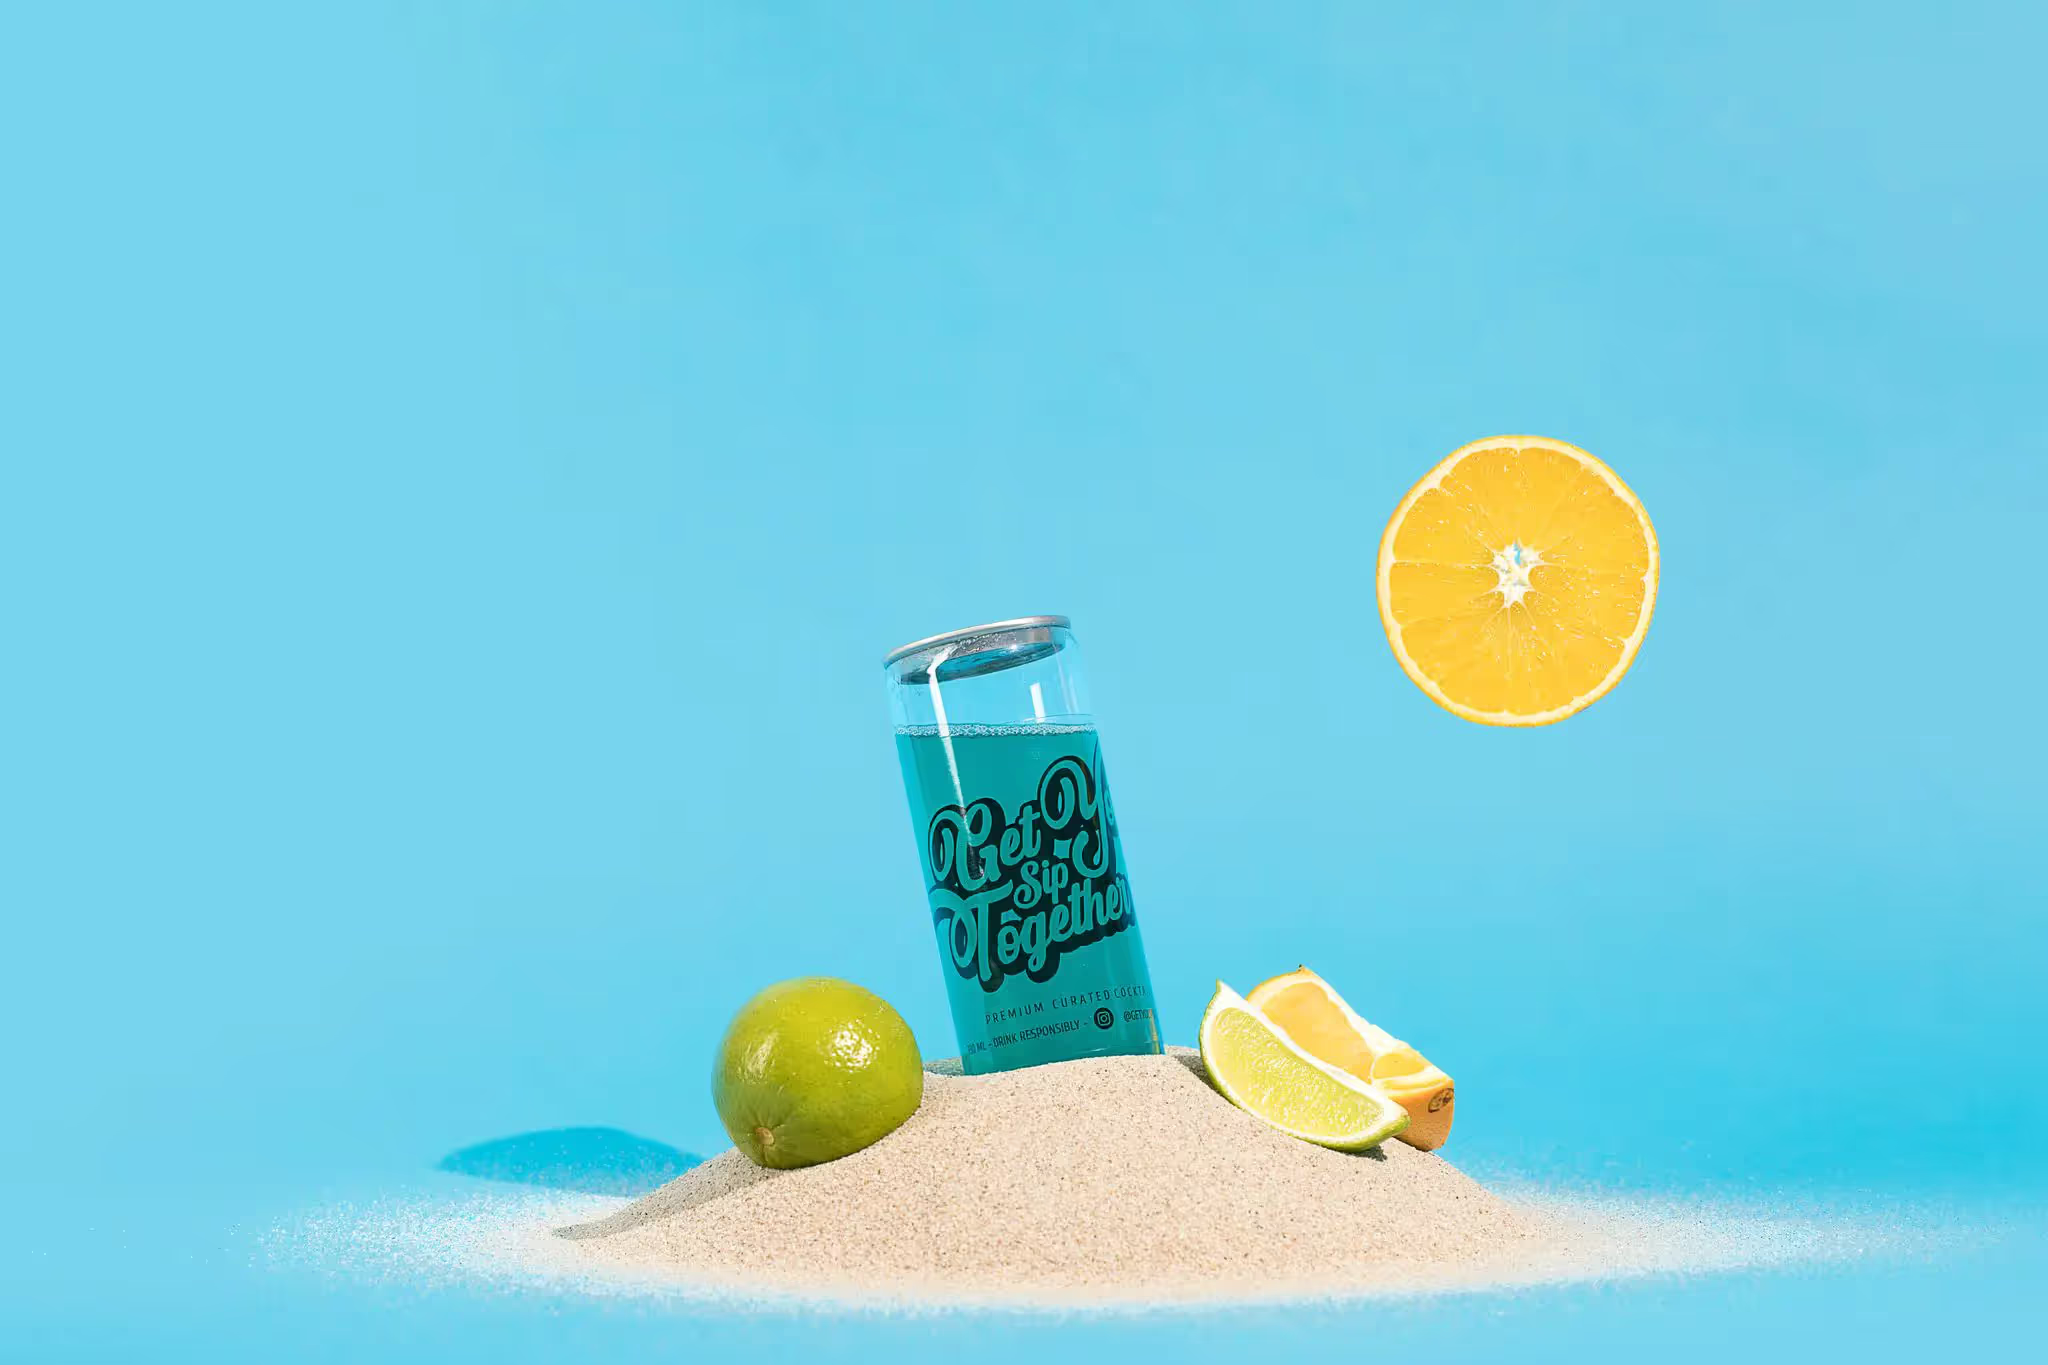
- gather several products. collect all the items you want to have photographed. And then grab some more. food and beverage items are the hardest to work “photo magic” on so it’s always a good idea to have several versions of each product item. this will allow for you and your photographer to let the creativity flow!
- buy props. some photography services (like soona) offer prop shopping as service for an additional fee. these services can help save time and ensure all your props arrive on time to the studio. if you prefer to shop for your props yourself - you need to make sure you time out your shopping trip correctly so your food and/or flowers are as fresh as possible going into the shoot.
- hire a stylist. it’s imperative that you hire a stylist who can expertly prep your food products to look as delicious as they taste. especially if you plan to include fresh ingredients as props to tell your product story. even if you're a master chef: photographing food takes some tricks.
Conclusion
Staying on-track and on-budget with your photoshoot is easy when you’ve properly prepped for your shoot. By investing time into product prep before your shoot, you can almost guarantee your shoot will go smoothly and you’ll love your end result. It’ll save you time, money, and a lot of frustration.
🔥 Hot tip: Book your shoot with soona for a stress-free photoshoot experience. If you need high-quality product images and videos but don’t want to break the bank, deal with setting up an at-home studio, or feel intimidated by the creative process of creating content—soona is a great place to go.
Get high-quality content for $39 per photo and $93 per video clip, plus a monthly subscription or a one-time booking fee.
Not near a soona studio? Not a problem. All you have to do is create your booking, ship your product to a soona location (free shipping on your first label), and join your shoot to collaborate with the soona team as you watch your photos appear on your soona dashboard in real time. Then you only buy the assets you love. Edited content is delivered to you within 72 hours of checkout. Easy peasy.
product preparation is critical
picture this: you have a big presentation where you want - no… need - to convince someone of your brilliant idea. it’s critical that the group you are presenting to really believes in your idea - your livelihood might even depend on it. do you go into that meeting unprepared and just wing it? of course you don’t! you invest time in your strategy and preparation and really think about how you want to present your genius idea - right? it’s the same concept when preparing for your ecomm photoshoot. you are getting this fresh high-quality content to present to potential customers with the hopes these potential customers are convinced they cannot live without your product. photoshoot prep is an essential part of creating content that will lead to conversions. you need a plan. you need to prepare. the rest will fall into place. taking the time to prep your products - no matter what industry you are in - will lead to saving time. saving money. better quality content. and consistency to boot.

how you can save time
showing up to any photoshoot without proper prep is a big no-no. it will lead you and the photographer feeling frustrated. by taking the time to plan your shoot and prep your products you’ll save yourself headache and money. let’s look at a worst-case scenario: you have a line of shirts that you’re selling. you show up to your shoot with your shirts you threw into a bag a couple of weeks ago. you remove them at the shoot only to find they are all wrinkled. some have water stains. and one has a small tear. now what? your products - no matter how awesome they are - are in no condition to be photographed. your photographer knows that the condition of your products are beyond anything that could be remedied in photoshop during post-production. they refuse to do the shoot and ask you to reschedule. you’ll have to find another day they are free - which could be weeks or months! - and block off another few hours for your photoshoot. plus any time you need to make sure your items are prepped and ready this time.if you’d just taken a few days to check your inventory and get your products in picture-perfect condition - you’d already have your edited images back!
how you can save money
let’s play out this shirt scenario another way: you show up to your shoot with your bag of shirts. your bestseller has a small stain but otherwise the rest of your shirts are just wrinkled. the photographer is willing to do the shoot but they charge you extra to have an assistant join the shoot to steam the shirts. and that labor will cost you. the stain is on a solid-colored shirt and it's small so it should only take a little extra photo editing magic to remove it - an additional cost.maybe these are small additional fees. or maybe the photographer realizes they can’t edit out the stain as easily as they thought and they need you to come back in to shoot that shirt which requires an additional fee for their time and effort.
{{studio-ad}}
produce higher quality product images
this is a no-brainer. the better your product looks - the better your product photos are going to look. the camera will capture all the amazing and beautiful features of your product. it’ll also capture any defects no matter how small. just like you want to present your best self when having your picture taken - so does your product! it wants to look beautiful under those studio lights and be ready for its close up.💡 check out how beauty brands can highlight the details when shooting high-quality product photos.
create consistent content
you want to present your product as consistently as possible. with consistency comes trust. according to a 2019 Edleman report: 81% of consumers said they need to trust the brand before they can purchase from them. an easy way to break earned trust (or prevent trust from ever being established) is having content that seemingly shows your product looking different photo-to-photo or platform-to-platform. your content should be cohesive - from your website to your social media to your emails. customers shouldn’t have to wonder which is the more accurate representation of your product. having a product prep process for shoots will automatically lend itself to your products having a consistent appearance.
what you need to prep products before a photoshoot
before your first (or next) photoshoot we recommend creating a photoshoot checklist and/or toolkit. your basis for needing new content may vary but the process of which you go about prepping your products and preparing for your shoot should remain largely unchanged. having a plan of attack. understanding your basic photoshoot needs. and knowing what additional services you want will help you have a stress-free & on-budget photoshoot every. single. time.
create a photoshoot plan of attack
this is one of the most important steps to feeling properly prepared for your product photoshoot. you need to establish your foundation for you can plan anything else. you might miss opportunities if you don't answer these questions for yourself before your shoot. when you're on a live photoshoot and trying to decide goals - you won't be as successful:
- why do I need to book a photoshoot?
- what are the goals of this photoshoot?
- what type of content do I need? flat lay? lifestyle? video?
- do I need photo and video?
- is there a primary location this content is going to live? (think: Amazon has specific requirements you don’t have to follow for social media or Shopify.)
- how many products do I need shots of?
- are they all individual shots? are they group shots? or is it a mix?
- do you need any special props?
- do you need a model? what about a stylist? (stylists are often necessary for complex food shoots. shoots with apparel. or if there are props to style.)
- are there specific colors you want used? (Amazon requires white backgrounds but you can mix it up on your own channels!)
once you’ve answered these questions you should have a pretty solid understanding of what you really need to get out of your shoot which will help you determine whether you need an individual/freelance photographer or full photography service.
create a shotlist
having a general vision of what you want your images to look like is key. you can communicate this easily to your photographer by creating a shotlist. this is just a simple list with basic instructions - don’t worry if you’re not a creative genius! creating a shotlist allows you to describe any inspiration images you want to try to replicate. the more specific you can be - the better! This is the place to list out any preferences on colors (ex: always use pink. or never use pink). lighting. close ups. depth of field adjustments. or different angles.something like this is a great starting point:environment: backdropbackdrop color: light bluelighting: soft/ natural lightangle: overheadprops: mirror and white flowers. description: product is laying on a mirror surrounded by white flowers. light blue backdrop.a shot list helps you create efficiencies in your shoot. you can organize your shoot plan by angle and product type to avoid changing the setup too often.
book additional services
depending on whether you choose to work with an independent photographer or a full service photography company will determine how much work you need to put into sourcing additional services for your shoot. since you created a stellar plan of attack at the beginning of this process - you’ve budgeted and are ready to find the team that’ll make your product shine.every service you need generally comes with another person to pay. those fees can vary depending on how long your shoot is and what the ask is (ex: a stylist may cost more than a hand model). most independent photographers have a resource list for models. stylists. and hair & makeup artists. some photographers will book those services for you based on guidelines you provide them (for an additional fee of course). others require you to source and coordinate your own services which can take time and resources you may or may not have.full service photography studios are just that: full service. those studios have a large roster of professionals they’ve worked with for a flat fee. they also can offer additional services like prop shopping if needed.
how to prepare every time of product for a photoshoot
the steps to making sure your product is prepared can vary depending on your product type and the type of content you are shooting. here's a break down of a few common product types:
clothing
take these steps to ensure your apparel is ready for action:
- collect items in the right size. if you are using a model then you need to bring prepped items that are in that model’s size. but if you are looking to shoot flat lay or mannequin shots only: bring the smallest size you carry. the smaller the size - the easier it is to manipulate and style it within the frame.
- gather duplicates. it’s important to bring at least two of everything. you never know what might happen so a backup is always a great idea.
- inspect. thoroughly check over every item you are taking to the shoot. make sure the product and its backup are stain-free. tear-free. and defect-free.
- steam/iron. this is an important step to creating a super polished look. there shouldn’t be a wrinkle in sight. this is a great step to have your stylist do. remember to bring pins and tape for on-model shots and flat lays.
- bring a lint roller. before the camera starts clicking: give your items a quick once-over with a lint roller to collect any stray threads. hairs. or dust particles.

jewelry
take these steps to make sure your jewels are ready to shine:
- collect your items. gather every item you want to shoot and group them in a way that makes sense to you and your photoshoot plans. maybe you want to group all earrings together or you have earring & necklace sets you want to capture together.
- gather duplicates. make sure you bring multiples of each piece - especially with jewelry. you never know when you might lose a stone or an earring!
- inspect. really look over every piece you want to shoot. make sure you’re not missing any stones or there aren’t other defects the camera will pick up.
- polish. get your items looking shiny and beautiful by giving them a good clean.
- repeat 1-4 boxes or other packaging. your boxing should be just as camera-ready as the goodies it holds inside!
- handle with gloves. after you’ve cleaned your boxes/packaging & jewelry - only handle them with lint-free gloves. This will maintain the cleanliness you just worked so hard on and avoid your items being riddled with fingerprints.

food/beverage
take these steps to make sure your food & beverage products look delicious:
- gather several products. collect all the items you want to have photographed. And then grab some more. food and beverage items are the hardest to work “photo magic” on so it’s always a good idea to have several versions of each product item. this will allow for you and your photographer to let the creativity flow!
- buy props. some photography services (like soona) offer prop shopping as service for an additional fee. these services can help save time and ensure all your props arrive on time to the studio. if you prefer to shop for your props yourself - you need to make sure you time out your shopping trip correctly so your food and/or flowers are as fresh as possible going into the shoot.
- hire a stylist. it’s imperative that you hire a stylist who can expertly prep your food products to look as delicious as they taste. especially if you plan to include fresh ingredients as props to tell your product story. even if you're a master chef: photographing food takes some tricks.

Conclusion
Staying on-track and on-budget with your photoshoot is easy when you’ve properly prepped for your shoot. By investing time into product prep before your shoot, you can almost guarantee your shoot will go smoothly and you’ll love your end result. It’ll save you time, money, and a lot of frustration.
🔥 Hot tip: Book your shoot with soona for a stress-free photoshoot experience. If you need high-quality product images and videos but don’t want to break the bank, deal with setting up an at-home studio, or feel intimidated by the creative process of creating content—soona is a great place to go.
Get high-quality content for $39 per photo and $93 per video clip, plus a monthly subscription or a one-time booking fee.
Not near a soona studio? Not a problem. All you have to do is create your booking, ship your product to a soona location (free shipping on your first label), and join your shoot to collaborate with the soona team as you watch your photos appear on your soona dashboard in real time. Then you only buy the assets you love. Edited content is delivered to you within 72 hours of checkout. Easy peasy.


