They say a picture is worth a thousand words. What’s your headshot saying about you? A headshot photo introduces you before you say anything out loud—it’s your photographic first impression.
Nailing that headshot image is as important as great product shots for ecommerce and social media too. You’re selling yourself and your headshot image can make or break the audience’s first impression of you. We’re giving you 10 headshot photography tips on how to nail that picture and create irresistible headshot photography.

We believe in the power of a photographic first impression—and free headshots for everyone >
10 headshot photography tips for amazing pictures every time
Consider these 10 tips to help make capturing the perfect headshot just a little bit easier.

1. Pick your tone and stick to it
The first step to getting the perfect headshot image is to identify a tone. It’s like picking the right vibe for the image. It’s important to consider this aspect of the headshot because tone plays an essential role in the final image.
Are you going for playful? Serious? Subtle? Or bold? Decide on one then stick to it throughout the photo shoot.
🏆 Tip for success🏆
Don’t let the professional nature of headshot photography fool you. You can still play around with tone and make it work for the end result you’re after. Keep the subject’s profession in mind when settling on a tone. A headshot for a lawyer will look radically different than one for a graphic designer.
2. Choose the right clothing
Picking the right outfit falls in line with picking the right tone. This aspect of headshot photography might feel a little superficial, but we promise it’s important. Humans are extremely visual creatures. Let’s dig into that evolutionary development…
We learned a long time ago that visual indicators (like outfit and facial expression) can offer helpful insight into how an interaction will play out. This was essential to our survival as a species. There were distinct visuals that gave us the ability to determine who was a predator and whether or not there was imminent danger.
This is precisely why outfit choice and overall appearance matters. It gives a sense of who you are before you say a single word. The right outfit will convey who you are and what you can do for someone. And it can say a whole lot of different things: competent, fun, trustworthy, intelligent, bold. But remember, a professional headshot can also misrepresent you if you don’t go with a headshot-appropriate outfit.
🏆Tip for success🏆
Consider what you want the headshot to communicate. What will people think of you when they see your face for the first time? Always pick an outfit that supports the overall tone you settled on. Don’t pick an outfit that clashes with the background or hogs visual attention. It also doesn’t hurt to plan a backup outfit (or two). Maybe the original outfit clashes with the background, or maybe the subject gets a bit of mustard on their shirt on the way to the studio.
3. Pick the right makeup
Makeup also plays an integral part in how a headshot is perceived by others. It goes hand in hand with outfit choice. Makeup dates as far back as ancient Egypt and Rome. Humans have used makeup throughout time to change their appearance and distinguish themselves from others. The perfect headshot makeup isn’t about a flawless contour or perfect red lip. It’s about presenting the best and most polished version of the subject.
🏆Tip for success🏆
Makeup shouldn’t be distracting. You can use makeup to accentuate the subject’s best features, disguise blemishes, or emphasize the tone of your headshot. You should also avoid types of makeup that don’t photograph well, like powdered foundations. shimmery eyeshadows. heavy under-eye eyeliners.
4. Studio vs. backdrop vs. outdoors
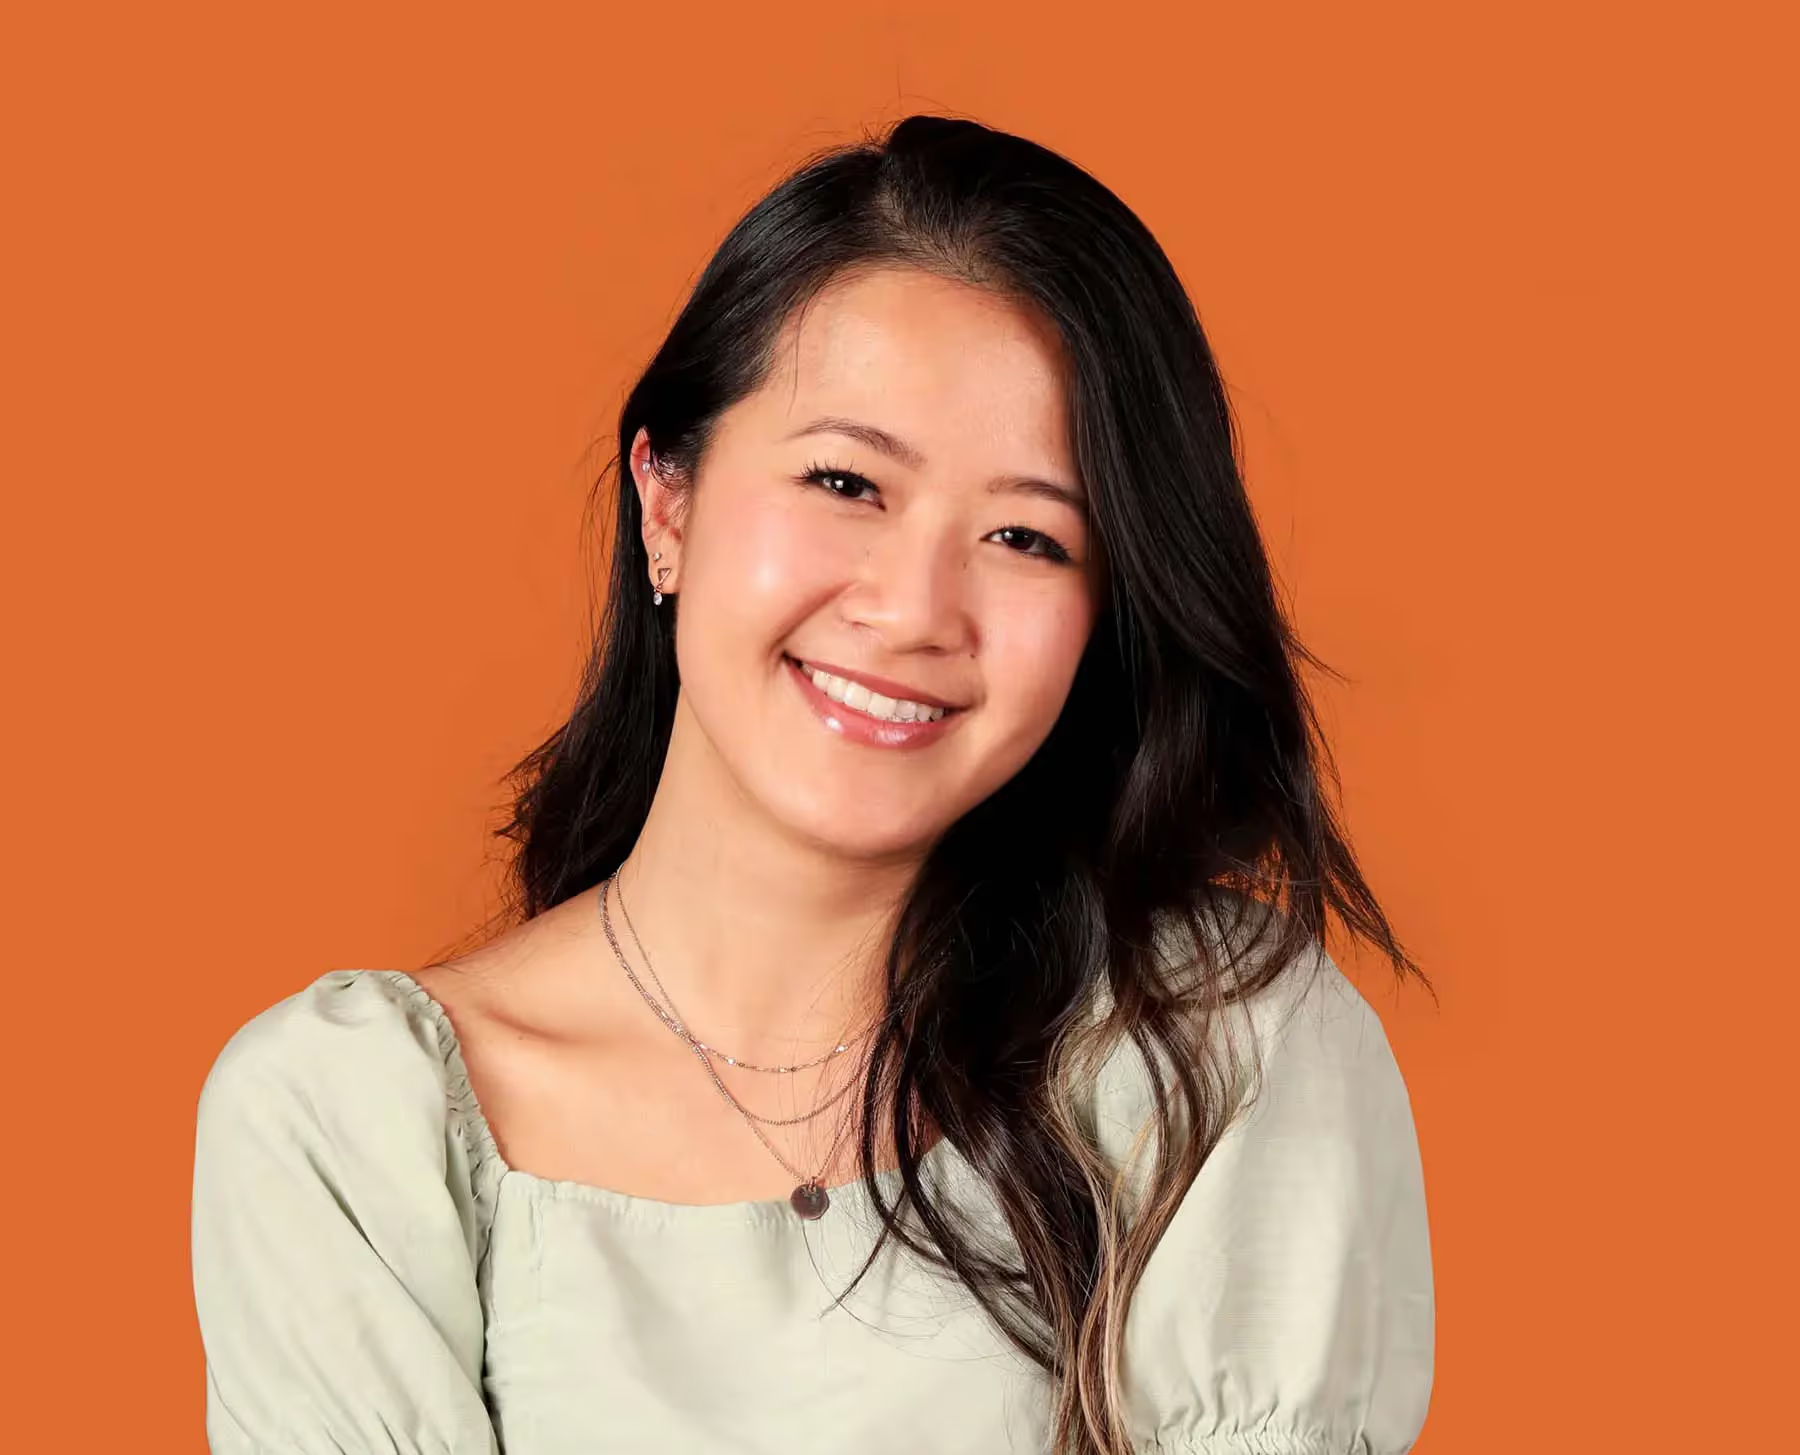
Choice of background helps solidify the tone of your headshot. Consider what the headshot is going to be used for when picking a backdrop.
Headshots on public profiles like LinkedIn should be more subdued, simple, clean, and minimal. Headshots for websites and personal branding projects are completely different. they might call for a different kind of backdrop: more vibrant with a splash of personality.
It’s common to shoot professional business headshots in indoor studios with backdrops. But that’s not a hard and fast rule. Feel free to take it outside as long as it will contribute to the tone and composition of the headshot. Pick a spot without a distracting background if you decide to take it outside. The focus should remain on the subject—not on the brick wall behind them.
🏆Tip for success🏆
Backgrounds don’t have to be boring. They just shouldn’t be the star of the show. The background should never outshine your subject. They’re kind of like the perfect sidekick—there when you need them but out of the way when your subject is ready to take the lead.
5. Create a positive environment
Being in front of the lens can be nerve-wracking for many people. It’s important to create a relaxed and positive environment during the shoot. You can see tension from a mile away. Maybe the subject is having an off day, or maybe they’re stressed from issues at home. You’ll be able to see it in the final shot if you can’t get them to relax a little bit before you shoot.
🏆Tip for success🏆
It doesn’t take much to help break the ice. Start by having the subject make a goofy face for test shots. This little request can help them relax throughout the shoot.
Another pro tip: Put on a fun playlist to get them movin’ and groovin’. Don’t forget to provide feedback to the subject throughout the session. Most people don’t have extensive modeling experience. Maybe you see that you need some small tweaks to posture or facial expression? Coach them to get the perfect shot. You can also boost their self-esteem by complimenting them on the things they’re getting right.
6. Nail the positioning
Angles, angles, angles. It’s all about the angles. Positioning the subject within the frame is just as important as getting the right light. Composition is key to allowing the subject to shine and stand out from the rest of the image.
🏆Tip for success🏆
Don’t forget the long-standing rule of thirds. Many headshots are cropped to feature the subject in the center of the image, but that’s not the only way you can frame a headshot. Positioning the subject within the left or right 1/3rd of the image can offer visual interest. There’s an advantage to doing it that way: that single image can also create multiple images simply through the magic of cropping..
7. Fine tune as you go
Making small tweaks as you go is an easy way to make sure you get the perfect headshot. Taking small pauses throughout your shoot can help give you and your subject real-time feedback. There’s nothing worse than to get to the end of the shoot only to find out that the subject was slightly overexposed or the angles seem off.
🏆Tip for success🏆
Shooting tethered is a great option. You can get real-time feedback on the raw images to see if what you’re capturing is 💯. Real-time feedback helps both the photographer and subject capture the perfect headshot image. Sometimes all it takes is reviewing an image for the subject to be able to make slight adjustments to nail that pose.
8. Focus on the features
Headshot photography is all about making your subject look good. Focusing on the background or their outfit can distract from this main goal. Make sure your focal point lands on the face of the subject. Most professional headshots are shot with the background out of focus so it doesn’t distract from the person you’re trying to capture.

🏆Tip for success🏆
Try setting your f-stop so the background is blurred out. You can also use post-shoot image editing to help bring sharpness to the subject and blur out or desaturate the background.
Customize your images by blurring the background to fit whatever you sell, wherever you sell >
9. Use the best lens
Seasoned photographers know not all lenses are created equally. There’s a lens for every occasion and not all lenses are the best for headshot photography. Portrait-length lenses are perfect for headshots. They do the best job of realistically capturing your subject. Using a shorter length lens (like 35mm) doesn’t just distort your image. It also requires you to get uncomfortably close to your subject to get the best framing.
🏆Tip for success🏆
Knowing which lens is best for headshot photography comes down to one general rule of thumb: you should avoid lenses with mid to wide angles. Mid to wide angle lenses will distort the image. This can result in the subject looking wider (or heavier) than real life.
Any lens 90mm or above is perfect for headshot photography because it can provide the least distorted image. Note that distortion can happen with these lenses, but it’s different because it’ll be the slimming kind of distortion as opposed to wide angle distortion.
10. Consider multiple locations
You should always consider multiple locations. Preparation is key to making a photoshoot run as smooth as a well-oiled machine. Alternate locations are a must when some of those locations are outdoors. Inclement weather has a tendency to strike when it’s least welcome. It’s better to be prepared with backup options rather than postpone a shoot.
🏆Tip for success🏆
Consider a handful of locations that match the desired tone. here are some examples by profession:
- Lawyer: office, studio with a plain background, or even a courthouse
- Executive: office, outdoors
- Designer: creative workspace, outdoors, or in a studio with a colorful but understated background
- Author: at a desk, in a chair, outdoors, or in a doorway
These can also be great (free) options if you don’t have access to a professional photographer or photography studio.
Headshot vs portrait: what's the difference?
Headshots and portraits: same difference right? There’s actually a difference. Let’s break it down:
- Framing: A headshot is framed specifically around the head and shoulders. There’s much more flexibility in the framing of a portrait. A portrait is usually broader and can include a full body shot.
- Focus position: We’re talking about the subject’s focus position here. Typically your subject will look straight into the camera lens for headshots whereas portraits can have a variety of different focal positions. You might see portrait photography where the subject is focused slightly off-camera. That tends to give it a more candid vibe - which isn’t always what headshot photography aims to achieve.
- Environment: Backgrounds in headshots are just that: backgrounds. They don’t have to be boring but they shouldn’t be the star of the show. Tone things down a bit and make sure your focal point is on the face. Go hog wild for portraits. Want a crazy balloon-filled background? Do your thing. It’s more about setting a scene for portraits.
- Purpose: Before you start your shoot think about what these images will be used for. Headshots are more formal by nature. You will most often see headshots in professional settings: LinkedIn, resumes, etc. Portraits images are part of a personal branding package, think editorial, portraits tell a personal story.
- Time: Headshots can usually be taken quickly. You can easily book a headshot shoot for an hour or two and get a handful of good images to choose from. Lighting and backdrop are still important, but they should take less time to set up for headshots. Portraits take a little bit more time to set up since they are more involved. You’ll have more moving pieces when shooting portraits. This is especially true if you plan on changing backdrops or settings.
Get started with headshot photography
Ready to jump into headshot photography? Make sure you keep those ten tips in mind before you get started. Headshots are a great way to visually communicate your personality, and what makes you, you. Every month, we offer free headshots at one of our soona studios.
Headshots for all
We believe in the power of a photographic first impression. And free headshots for everyone.
LEARN MORE
They say a picture is worth a thousand words. What’s your headshot saying about you? A headshot photo introduces you before you say anything out loud—it’s your photographic first impression.
Nailing that headshot image is as important as great product shots for ecommerce and social media too. You’re selling yourself and your headshot image can make or break the audience’s first impression of you. We’re giving you 10 headshot photography tips on how to nail that picture and create irresistible headshot photography.

We believe in the power of a photographic first impression—and free headshots for everyone >
10 headshot photography tips for amazing pictures every time
Consider these 10 tips to help make capturing the perfect headshot just a little bit easier.

1. Pick your tone and stick to it
The first step to getting the perfect headshot image is to identify a tone. It’s like picking the right vibe for the image. It’s important to consider this aspect of the headshot because tone plays an essential role in the final image.
Are you going for playful? Serious? Subtle? Or bold? Decide on one then stick to it throughout the photo shoot.
🏆 Tip for success🏆
Don’t let the professional nature of headshot photography fool you. You can still play around with tone and make it work for the end result you’re after. Keep the subject’s profession in mind when settling on a tone. A headshot for a lawyer will look radically different than one for a graphic designer.
2. Choose the right clothing
Picking the right outfit falls in line with picking the right tone. This aspect of headshot photography might feel a little superficial, but we promise it’s important. Humans are extremely visual creatures. Let’s dig into that evolutionary development…
We learned a long time ago that visual indicators (like outfit and facial expression) can offer helpful insight into how an interaction will play out. This was essential to our survival as a species. There were distinct visuals that gave us the ability to determine who was a predator and whether or not there was imminent danger.
This is precisely why outfit choice and overall appearance matters. It gives a sense of who you are before you say a single word. The right outfit will convey who you are and what you can do for someone. And it can say a whole lot of different things: competent, fun, trustworthy, intelligent, bold. But remember, a professional headshot can also misrepresent you if you don’t go with a headshot-appropriate outfit.
🏆Tip for success🏆
Consider what you want the headshot to communicate. What will people think of you when they see your face for the first time? Always pick an outfit that supports the overall tone you settled on. Don’t pick an outfit that clashes with the background or hogs visual attention. It also doesn’t hurt to plan a backup outfit (or two). Maybe the original outfit clashes with the background, or maybe the subject gets a bit of mustard on their shirt on the way to the studio.
3. Pick the right makeup
Makeup also plays an integral part in how a headshot is perceived by others. It goes hand in hand with outfit choice. Makeup dates as far back as ancient Egypt and Rome. Humans have used makeup throughout time to change their appearance and distinguish themselves from others. The perfect headshot makeup isn’t about a flawless contour or perfect red lip. It’s about presenting the best and most polished version of the subject.
🏆Tip for success🏆
Makeup shouldn’t be distracting. You can use makeup to accentuate the subject’s best features, disguise blemishes, or emphasize the tone of your headshot. You should also avoid types of makeup that don’t photograph well, like powdered foundations. shimmery eyeshadows. heavy under-eye eyeliners.

4. Studio vs. backdrop vs. outdoors
Choice of background helps solidify the tone of your headshot. Consider what the headshot is going to be used for when picking a backdrop.
Headshots on public profiles like LinkedIn should be more subdued, simple, clean, and minimal. Headshots for websites and personal branding projects are completely different. they might call for a different kind of backdrop: more vibrant with a splash of personality.
It’s common to shoot professional business headshots in indoor studios with backdrops. But that’s not a hard and fast rule. Feel free to take it outside as long as it will contribute to the tone and composition of the headshot. Pick a spot without a distracting background if you decide to take it outside. The focus should remain on the subject—not on the brick wall behind them.
🏆Tip for success🏆
Backgrounds don’t have to be boring. They just shouldn’t be the star of the show. The background should never outshine your subject. They’re kind of like the perfect sidekick—there when you need them but out of the way when your subject is ready to take the lead.
5. Create a positive environment
Being in front of the lens can be nerve-wracking for many people. It’s important to create a relaxed and positive environment during the shoot. You can see tension from a mile away. Maybe the subject is having an off day, or maybe they’re stressed from issues at home. You’ll be able to see it in the final shot if you can’t get them to relax a little bit before you shoot.
🏆Tip for success🏆
It doesn’t take much to help break the ice. Start by having the subject make a goofy face for test shots. This little request can help them relax throughout the shoot.
Another pro tip: Put on a fun playlist to get them movin’ and groovin’. Don’t forget to provide feedback to the subject throughout the session. Most people don’t have extensive modeling experience. Maybe you see that you need some small tweaks to posture or facial expression? Coach them to get the perfect shot. You can also boost their self-esteem by complimenting them on the things they’re getting right.
6. Nail the positioning
Angles, angles, angles. It’s all about the angles. Positioning the subject within the frame is just as important as getting the right light. Composition is key to allowing the subject to shine and stand out from the rest of the image.
🏆Tip for success🏆
Don’t forget the long-standing rule of thirds. Many headshots are cropped to feature the subject in the center of the image, but that’s not the only way you can frame a headshot. Positioning the subject within the left or right 1/3rd of the image can offer visual interest. There’s an advantage to doing it that way: that single image can also create multiple images simply through the magic of cropping..
7. Fine tune as you go
Making small tweaks as you go is an easy way to make sure you get the perfect headshot. Taking small pauses throughout your shoot can help give you and your subject real-time feedback. There’s nothing worse than to get to the end of the shoot only to find out that the subject was slightly overexposed or the angles seem off.
🏆Tip for success🏆
Shooting tethered is a great option. You can get real-time feedback on the raw images to see if what you’re capturing is 💯. Real-time feedback helps both the photographer and subject capture the perfect headshot image. Sometimes all it takes is reviewing an image for the subject to be able to make slight adjustments to nail that pose.
8. Focus on the features
Headshot photography is all about making your subject look good. Focusing on the background or their outfit can distract from this main goal. Make sure your focal point lands on the face of the subject. Most professional headshots are shot with the background out of focus so it doesn’t distract from the person you’re trying to capture.

🏆Tip for success🏆
Try setting your f-stop so the background is blurred out. You can also use post-shoot image editing to help bring sharpness to the subject and blur out or desaturate the background.
Customize your images by blurring the background to fit whatever you sell, wherever you sell >
9. Use the best lens
Seasoned photographers know not all lenses are created equally. There’s a lens for every occasion and not all lenses are the best for headshot photography. Portrait-length lenses are perfect for headshots. They do the best job of realistically capturing your subject. Using a shorter length lens (like 35mm) doesn’t just distort your image. It also requires you to get uncomfortably close to your subject to get the best framing.
🏆Tip for success🏆
Knowing which lens is best for headshot photography comes down to one general rule of thumb: you should avoid lenses with mid to wide angles. Mid to wide angle lenses will distort the image. This can result in the subject looking wider (or heavier) than real life.
Any lens 90mm or above is perfect for headshot photography because it can provide the least distorted image. Note that distortion can happen with these lenses, but it’s different because it’ll be the slimming kind of distortion as opposed to wide angle distortion.
10. Consider multiple locations
You should always consider multiple locations. Preparation is key to making a photoshoot run as smooth as a well-oiled machine. Alternate locations are a must when some of those locations are outdoors. Inclement weather has a tendency to strike when it’s least welcome. It’s better to be prepared with backup options rather than postpone a shoot.
🏆Tip for success🏆
Consider a handful of locations that match the desired tone. here are some examples by profession:
- Lawyer: office, studio with a plain background, or even a courthouse
- Executive: office, outdoors
- Designer: creative workspace, outdoors, or in a studio with a colorful but understated background
- Author: at a desk, in a chair, outdoors, or in a doorway
These can also be great (free) options if you don’t have access to a professional photographer or photography studio.
Headshot vs portrait: what's the difference?
Headshots and portraits: same difference right? There’s actually a difference. Let’s break it down:
- Framing: A headshot is framed specifically around the head and shoulders. There’s much more flexibility in the framing of a portrait. A portrait is usually broader and can include a full body shot.
- Focus position: We’re talking about the subject’s focus position here. Typically your subject will look straight into the camera lens for headshots whereas portraits can have a variety of different focal positions. You might see portrait photography where the subject is focused slightly off-camera. That tends to give it a more candid vibe - which isn’t always what headshot photography aims to achieve.
- Environment: Backgrounds in headshots are just that: backgrounds. They don’t have to be boring but they shouldn’t be the star of the show. Tone things down a bit and make sure your focal point is on the face. Go hog wild for portraits. Want a crazy balloon-filled background? Do your thing. It’s more about setting a scene for portraits.
- Purpose: Before you start your shoot think about what these images will be used for. Headshots are more formal by nature. You will most often see headshots in professional settings: LinkedIn, resumes, etc. Portraits images are part of a personal branding package, think editorial, portraits tell a personal story.
- Time: Headshots can usually be taken quickly. You can easily book a headshot shoot for an hour or two and get a handful of good images to choose from. Lighting and backdrop are still important, but they should take less time to set up for headshots. Portraits take a little bit more time to set up since they are more involved. You’ll have more moving pieces when shooting portraits. This is especially true if you plan on changing backdrops or settings.
Get started with headshot photography
Ready to jump into headshot photography? Make sure you keep those ten tips in mind before you get started. Headshots are a great way to visually communicate your personality, and what makes you, you. Every month, we offer free headshots at one of our soona studios.
Headshots for all
We believe in the power of a photographic first impression. And free headshots for everyone.
LEARN MORE


