Footwear photography is going to have a lot of similarities with makeup or jewelry photography best practices. Footwear is something that holds a lot of responsibility: comfort, style, ease, longevity. Conveying all of that to your customers IRL is hard enough. But as an ecomm business you have the added challenge of proving yourself through a screen.
Below, check out shoe photography tips to make sure you capture shots that drive engagement and sales.
6 shoe photography tips to boost sales
Start with a shot list
Whether you have one style of shoe or multiple, you’re going to prepare for your photoshoot by putting together a shot list before you do anything else.

Creating a shot list serves as a guide for you and any other professionals you work with on this shoot. It keeps everyone aligned with your brand. And it ensures that—when the photos are ready to post—they communicate your brand message to your customer. A strong brand identity is one of the most stand-out aspects of modern ecomm companies!
Consider lifestyle
Take a look at your fav footwear brands’ ecomm photos. chances are there’s a nice mixture of clean product-on-white images and lifestyle images. You’ll want to have a plan for where you want those sharp and simple photos on plain backgrounds—and where you’ll want a photo that sets a scene.
For example, putting a lifestyle photo in the product description may not help with your conversion. Customers on the product page want to see clear details of the footwear they’re purchasing. However, you might have a great idea for a lifestyle photo on your homepage of your website. This can help to engage your customers—relate to them—and allow them to see how your footwear belongs in their life.
Show your customers how much better life would be with your product >
Experiment with angles
Shoes can be awkward to photograph because the customer wants to see a 360-degree view in a 2D format.

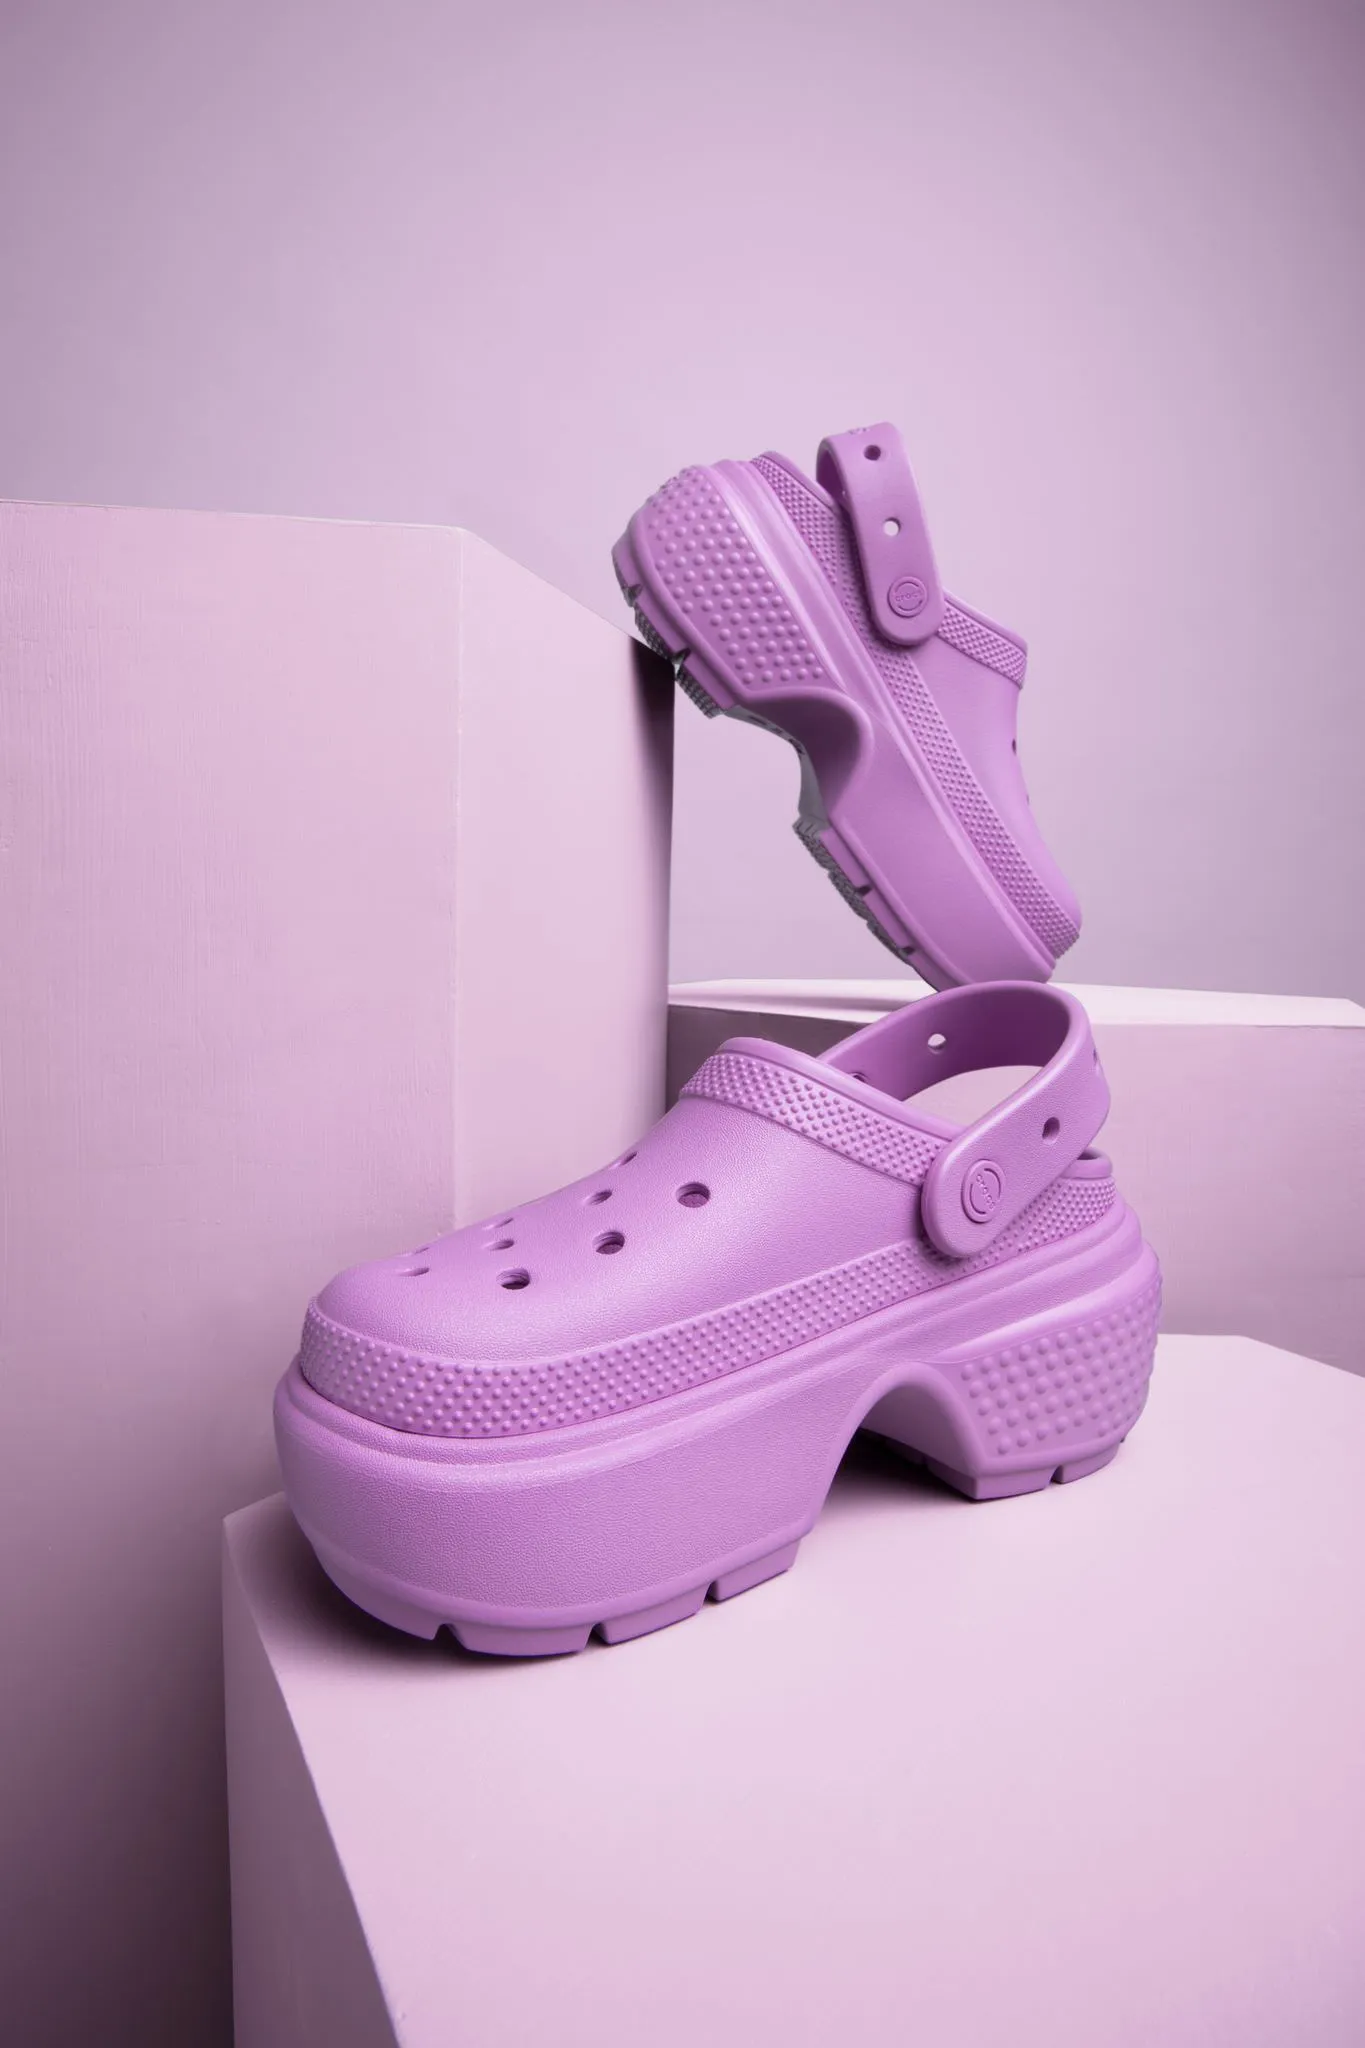
One tried-and-true way to achieve a footwear photo that’s not missing anything is to create a slanted angle (often called a ¾ view). it would be as if you were looking down at the shoes on a crooked table. This way you can see the toe-box, laces, sole, and side view.
Another approach we love is the “floating” illusion. It's especially fun to do this with footwear as it gives the effect of a shoe on the run— without a foot in it. You can make magic with a little bit of string and a photo editing app.
Tell a story
The art of storytelling in a product image is a delicate dance. You want detail but not clutter. Nuance but not distraction.

Think about how much you can say by choosing a background of grass vs. concrete. One says industrial while the other says natural. How about shoes in the sand vs. in a pile of leaves? What does this tell you about the season your product belongs in? You haven’t added any props and yet you’ve still made a design choice—the possibilities are endless.
Keep it clean
You’ll want to consider capturing all of your close-up footwear photos before you ever have a model wear them. This way you can be sure to have scuff-free images.
Keep a microfiber cloth on set to buff away any marks. Especially if your material is glossy—like vinyl or patent leather—you may want to handle your product with gloves. It may seem extra in the moment, but customers will notice every imperfection when they’re zooming into those high-quality images on your website.
Of course, when you’re doing lifestyle shots this is less important. A little mud on your trail runners for your rugged outdoor footwear is probably only going to contribute to the story. But it’s still important that there’s nothing unsightly or out of place—like a piece of hair or gum stuck to the sole. So you’ll want to prepare for any necessary cleaning. Doing a little work in this step saves you tons of time post-production fixing blemishes.
Use a model
A foot model can bring life and movement to your footwear photos. And you don’t have to budget much for a model of this type—you might even be able to find someone on your team who can do it. They can move around and show how the shoe functions, unlike a ghost mannequin or model-free shot. Remember, it’s always good to have a healthy mix of product content, so combine model-free shots with photos that feature humans to round out your product story.
Shoe photography mistakes to avoid
Flat shots
Your customers have to trust that your shoes are wearable. That doesn’t just mean they have a sole and laces. You have the responsibility of showing the customer something they will feel good wearing and look good wearing.
One major key to rise to the occasion is to show dynamic photos. Social media profiles for your brand are a great tool to build customer trust and show visual testimonials of your product in-use.
Harsh lighting
It’s super important to portray accurate product colors. But in footwear, a strange shadow and harsh lighting could drastically alter the shape and design of the shoe. Customers want to feel confident the product they see is what they will get when they receive their package.
Aim to work with natural light or diffused light whenever possible. But some shadows are fine! avoid editing out shadows from your photos post-production as this can make your product look artificial.
Busy backgrounds
So we covered creative yet simple backgrounds. Now let’s talk about what not to do.
Avoid clashing colors in your background. If your footwear is neutral, don’t go for the neon props in the background. They’ll fight for attention.

If you choose to show a model’s leg or ankle, avoid any distracting jewelry or marks. If it’s part of your aesthetic, go for it! But you can always do some careful editing after the shoot to remove the mom tattoo.
If you choose to use a model, consider what clothing they’ll be wearing in the preparation phase and be sure to give clear instructions. For example, don’t just tell them to wear jeans. Specify that they should wear light wash jeans with a raw hemline that fall above the ankle. This distinction might make a world of difference in the final photos.
Get started with footwear photography services with soona
If you’re ready to make some magic with your footwear photography shoot, soona is the complete content studio for brands. Make, manage, and measure creative with confidence.
{{studio-ad}}
Footwear photography is going to have a lot of similarities with makeup or jewelry photography best practices. Footwear is something that holds a lot of responsibility: comfort, style, ease, longevity. Conveying all of that to your customers IRL is hard enough. But as an ecomm business you have the added challenge of proving yourself through a screen.
Below, check out shoe photography tips to make sure you capture shots that drive engagement and sales.
6 shoe photography tips to boost sales
Start with a shot list
Whether you have one style of shoe or multiple, you’re going to prepare for your photoshoot by putting together a shot list before you do anything else.

Creating a shot list serves as a guide for you and any other professionals you work with on this shoot. It keeps everyone aligned with your brand. And it ensures that—when the photos are ready to post—they communicate your brand message to your customer. A strong brand identity is one of the most stand-out aspects of modern ecomm companies!
Consider lifestyle
Take a look at your fav footwear brands’ ecomm photos. chances are there’s a nice mixture of clean product-on-white images and lifestyle images. You’ll want to have a plan for where you want those sharp and simple photos on plain backgrounds—and where you’ll want a photo that sets a scene.
For example, putting a lifestyle photo in the product description may not help with your conversion. Customers on the product page want to see clear details of the footwear they’re purchasing. However, you might have a great idea for a lifestyle photo on your homepage of your website. This can help to engage your customers—relate to them—and allow them to see how your footwear belongs in their life.
Show your customers how much better life would be with your product >
Experiment with angles
Shoes can be awkward to photograph because the customer wants to see a 360-degree view in a 2D format.

One tried-and-true way to achieve a footwear photo that’s not missing anything is to create a slanted angle (often called a ¾ view). it would be as if you were looking down at the shoes on a crooked table. This way you can see the toe-box, laces, sole, and side view.
Another approach we love is the “floating” illusion. It's especially fun to do this with footwear as it gives the effect of a shoe on the run— without a foot in it. You can make magic with a little bit of string and a photo editing app.
Tell a story
The art of storytelling in a product image is a delicate dance. You want detail but not clutter. Nuance but not distraction.

Think about how much you can say by choosing a background of grass vs. concrete. One says industrial while the other says natural. How about shoes in the sand vs. in a pile of leaves? What does this tell you about the season your product belongs in? You haven’t added any props and yet you’ve still made a design choice—the possibilities are endless.
Keep it clean
You’ll want to consider capturing all of your close-up footwear photos before you ever have a model wear them. This way you can be sure to have scuff-free images.
Keep a microfiber cloth on set to buff away any marks. Especially if your material is glossy—like vinyl or patent leather—you may want to handle your product with gloves. It may seem extra in the moment, but customers will notice every imperfection when they’re zooming into those high-quality images on your website.
Of course, when you’re doing lifestyle shots this is less important. A little mud on your trail runners for your rugged outdoor footwear is probably only going to contribute to the story. But it’s still important that there’s nothing unsightly or out of place—like a piece of hair or gum stuck to the sole. So you’ll want to prepare for any necessary cleaning. Doing a little work in this step saves you tons of time post-production fixing blemishes.
Use a model
A foot model can bring life and movement to your footwear photos. And you don’t have to budget much for a model of this type—you might even be able to find someone on your team who can do it. They can move around and show how the shoe functions, unlike a ghost mannequin or model-free shot. Remember, it’s always good to have a healthy mix of product content, so combine model-free shots with photos that feature humans to round out your product story.
Shoe photography mistakes to avoid
Flat shots
Your customers have to trust that your shoes are wearable. That doesn’t just mean they have a sole and laces. You have the responsibility of showing the customer something they will feel good wearing and look good wearing.
One major key to rise to the occasion is to show dynamic photos. Social media profiles for your brand are a great tool to build customer trust and show visual testimonials of your product in-use.
Harsh lighting
It’s super important to portray accurate product colors. But in footwear, a strange shadow and harsh lighting could drastically alter the shape and design of the shoe. Customers want to feel confident the product they see is what they will get when they receive their package.
Aim to work with natural light or diffused light whenever possible. But some shadows are fine! avoid editing out shadows from your photos post-production as this can make your product look artificial.
Busy backgrounds
So we covered creative yet simple backgrounds. Now let’s talk about what not to do.
Avoid clashing colors in your background. If your footwear is neutral, don’t go for the neon props in the background. They’ll fight for attention.

If you choose to show a model’s leg or ankle, avoid any distracting jewelry or marks. If it’s part of your aesthetic, go for it! But you can always do some careful editing after the shoot to remove the mom tattoo.
If you choose to use a model, consider what clothing they’ll be wearing in the preparation phase and be sure to give clear instructions. For example, don’t just tell them to wear jeans. Specify that they should wear light wash jeans with a raw hemline that fall above the ankle. This distinction might make a world of difference in the final photos.
Get started with footwear photography services with soona
If you’re ready to make some magic with your footwear photography shoot, soona is the complete content studio for brands. Make, manage, and measure creative with confidence.
{{studio-ad}}


