


Today’s consumer marketplace is rich in options. Organizations rely not on true innovation every other second – who could possibly keep up that pace? – but on providing better versions of a particular product than their competitors or than that they previously offered.
The trick is catching a prospect’s attention long enough to convince them of this.
In such a jostling milieu, first impressions are everything. Bright, beautiful images that convey the impact of your brand are paramount to that good impression and effective PR. Hence, any image or graphic that loads slowly, is pixelated, is of poor quality, or isn’t adapted to mobile devices will work against you.
Welcome to image resizing, making sure that every lifestyle photo, behind-the-scenes shot, or foodie image is crisp, clear, and perfect for the device on which it is rendered.
But easier said than done, right? That’s where an image resizer comes in, helping to transform a single photo appropriate for one social media or ecommerce platform (or one device type) into one that works for every conceivable channel. Any organization aiming for a truly omnichannel approach – and any organization should aim for exactly that! – will find a free image resizer to be an invaluable tool.
In today’s post, we’ll discuss what an image resizer is, why it matters, how to resize an image, and what specs to use when doing so. Lastly, we’ll take a look at the best image resizer tool on the market today and discuss how you can integrate it into your product photography plan for best results.
What Is an Image Resizer?
An image resizer is a tool that allows you to adjust the size of your photo or graphic upwards or downwards to fit the requirements of a particular platform, social media channel, or device. A good image resizer will also help you crop the photo without losing any of the elements that matter.
To a certain extent, this depends on the photo or graphic itself. That’s why it’s important to have a lot of background or negative space in a product photo or behind a model, so you can afford to adjust where needed.
Finding it hard to visualize this? Consider a photograph of a model that puts the person in the middle third of a landscape photo, with beautiful but nonessential elements in the background – curtains, say, or trees that are out of focus. This image can now be sharply cropped in a vertical position for social media and phones, or left as a large landscape photo for a video or presentation.
Let’s say you don’t have enough background for that, though. You could use another image enhancement tool to crop out the background and replace it, blur it and merge it with another photo, extend it using AI tools, or otherwise transform it before then performing the resizing and crop services you need.
In a nutshell, an image resizer changes the size and dimensions of a photo, but also plays very well with a raft of other photo editing tools that take your images to the next level.
Why Image Resizing?
Before we discuss how to resize an image or where to find a free image resizer, we must first ask: Why does image resizing really matter? And does it have to be a whole song and dance? Can’t you just crop a photo a bit and be done with it?
{{resizer-ad="/external-components"}}
Well, yes and no. While much of your product photography might be easy to doctor before uploading to the web, you will run into challenges if you don’t have a streamlined, intentional approach. For instance:
- What do you do when you need a photo to shine in an email so you don’t want to cut it down, but you need it small enough that the email will send and load quickly?
- When you have an omnichannel campaign but the involved channels have very different image size requirements (think mobile, which is vertical, and YouTube, which is horizontal), how do you stay true to the image?
- What happens if you need to make a photo or graphic larger without losing quality?
Any of these situations is where an image resizer can help. Let’s take a look at some of the most basic use cases for resizing photos and graphics: boosting web performance, enabling online sharing, optimizing for mobile, meeting the requirements of specific channels, or upsizing where necessary.
Boost Web Performance
Large file sizes are one of the most common problems for websites. They render slowly, causing web pages to load at a glacial pace, which is irritating for shoppers and can cause them to bounce. If they can’t see your listings, why would they hang around?
Whether you’re trying to upload photos to an ecommerce giant like Amazon or Etsy, or are using them on your own site, it’s important they’re not too large. Even if they load quickly, the resizing algorithms native to ecommerce platforms may not edit your photos favorably, causing them to become grainy or blurred. That’s another good way to shoo your buyers away too soon, and no one wants that.
Even smartphones can take very large photos today, so comb through your media and make sure everything is the right size.
Enable Online Sharing
In addition to slowing down web performance, bloated photos inhibit quick sharing. Unfortunately, sharing is critical to a successful ecommerce business.
For instance, many businesses send regular emails to their customers with links to purchase. When those photos load slowly in the email body, customers aren’t impressed. Other businesses send media to collaborators or influencers, and it better come through crisp and clean, or they won’t want to work with you again.
Again, the solution to this is resizing the image so that it meets the specs for its intended use and comes through quickly.
Optimize for Mobile
Images on mobile are different than on desktop. The size requirements of tablets and phones mean you cannot simply upload a square or landscape photo that would look good on a desktop and be done.
Crop to Meet Channel-Specific Requirements
Social platforms and ecommerce platforms have specific image size requirements. If you want your products to stand out on Amazon, for instance, then they need to be sized to fit the thumbnails and display photos without any weird stretching, cropping, or blank space.
Therefore, it’s important to edit your photos to meet the specifications of the device and the ecommerce platform app or responsive desktop application you’re running on it.
Upsize Where Necessary
Upsizing is what it sounds like: making an image larger. However, what isn’t included in the name? That you must do so without losing quality.
When it comes to vector graphics, this is easy. A vector is a digital element that can be increased forever (or to the limits of the graphic design program in which it was created) without losing resolution. If you want to make the image bigger, then all you have to do is go into the program, increase the size of the artboard, select all, and increase the size of the objects rendered there.
Et voilà: bigger image with no loss of quality.
Raster images, however, are different. They are pixel-based, which means ultimately if you zoom in far enough, you will start to see the little boxes of different colors that make up the image. If you want to use a photograph that is 800 pixels wide in a desktop display that is 2,000 pixels wide, the result will be grainier than undercooked cornbread.
The answer is upsizing. Instead of just stretching the image to fit the space (which causes the rendering device to simply blow up the pixels and create larger blocks of color), you essentially rebuild it using the original shapes and colors of the photo, filling in the pixels to create a larger version of the original.
This is, as you might imagine, very difficult for a human to do pixel by pixel. It is, however, much easier for an AI to do – and luckily, there’s an AI for that! We’ll discuss it more below.
Before we do, though, let’s consider the individual image sizes called for by platform and channel. Knowing what they are and where to find them can dramatically improve the quality of your product photos – and your marketing success overall.
The Complete Guide to Online Image Sizes
There are some basic sizing guidelines for desktop and mobile. For instance, your image should be at least 1,500 pixels for desktop, though a higher-resolution photo or graphic (more like 3,000 pixels) is better for high-resolution displays. Typical ratios for a full-screen image are 4:3 or 16:9.
On mobile, images are vertical rather than the standard horizontal desktop display. The basic display ratio for today’s phones is 9x16, though 3:4 is typically still an acceptable size for social platforms. As for pixels, 1080x1920 pixels is a common image size, though some sources recommend a minimum of 1,680 in width and 3,000 in height.
These are, unfortunately, only the loosest of guidelines. That’s where specific guides come in.
Know Your Image Specs
Each platform has different size requirements. Some of these are relatively similar, such as TikTok and Instagram, the content for which is made to be consumed on a phone.
Others are quite different. Most platforms even have different image requirements within them, depending what type of media it is, whether it’s an ad, where it will be rendered, and so on. Suffice it to say, painstakingly googling each dimension when you need to resize an image quickly becomes tiresome.
Accordingly, soona took a minute (okay, way more than a minute) to create detailed guides for different platforms, so you always know where to find them. Make sure to bookmark these pages so you can reference them wherever needed.
Social media guides include:
Guides for the major ecommerce platforms include:
Again, remember to save these somewhere handy so you can access them any time, for any purpose. Scroll through each of them until you find the exact use case you’re looking for (e.g. the correct pin size for a recipe or the exact size for a Facebook column ad) to make sure you get it right!
That said, exactly how can you edit images for ecommerce listings? Let’s take a look now.
How to Edit an Image for Ecommerce Listings
Theoretically, you could laboriously resize each image for each platform, device, and use case. If so, you’d better have a pretty amazing budget, because given even a moderate amount of collateral, that could comprise full-time work for an employee – or more than one.
The much better approach is to use a free image resizer that will help you adjust media as needed. Once you’ve done so – say, resized a particular product photo for Amazon or Shopify – you can file it in a digital asset management tool, discussed below.
Why is it important to resize your photos for ecommerce listings? Because each platform has its own specifications and ways of rendering media, which means what works for one will not look good for the other, and vice versa. If you want your carefully curated images to shine, you need to size them appropriately – and then add in other editing steps as necessary.
We have discussed some of this above (such as upsizing and removing backgrounds), but we will go into more detail here.
Scaling Down
Perhaps the most common resizing move is to scale an image down. If you simply upload the image, the system will compress it to fit in the space. When you crunch 4,000 pixels into a space 1,000 pixels wide, the result is a blurry mess.
Scaling samples the image, decides what the most salient elements are, and recombines the colors and shapes to recreate the image at a smaller scale with fewer overall pixels. That means when the image loads in its 1,000-pixel space, it will be the right resolution.
Cropping
Cropping is when you shave pixels off the vertical or horizontal – or both – sides of a photo or graphic. It is often necessary to get the image to fit into its designated space.
Upsize
The number of pixels per inch, or density, is what determines how crisp an image is. Consider the opposite situation from scaling down, where you need a smaller image to fit a large space without stretching out weirdly. You can’t simply blow it up, because that means the pixels become larger chunks of the same color at reduced resolution.
Instead, you’ll need an intelligent graphic design tool, which samples the image in the same way as when scaling down. Then it expands the image, filling in pixels at the correct density – and therefore adding significantly more pixels than were in the original.
By using AI tools, you can ensure a crisp result that looks like it was taken at higher resolution rather than stretched out. It will take those formerly large blocks of a single color and fill them in with different colors at the same level of refinement.

Edit Background
One thing that helps resize an image is to have flexibility with the background. If yours is too limiting, you can simply remove it and then change it to whatever you like, be that another photo, black, white, or a color.
Gradients are another nice way to add visual appeal without having to add a real background. They bring immediacy to the photo and make it stand out, so they’re perfect for filling in background space when you don’t want to add text or other elements.
Add Shadows
Adding shadows is another way to edit a photo. While this isn’t technically necessary for resizing, it can help if you have added a plain color background as a means to an end when changing the dimensions of your photos.
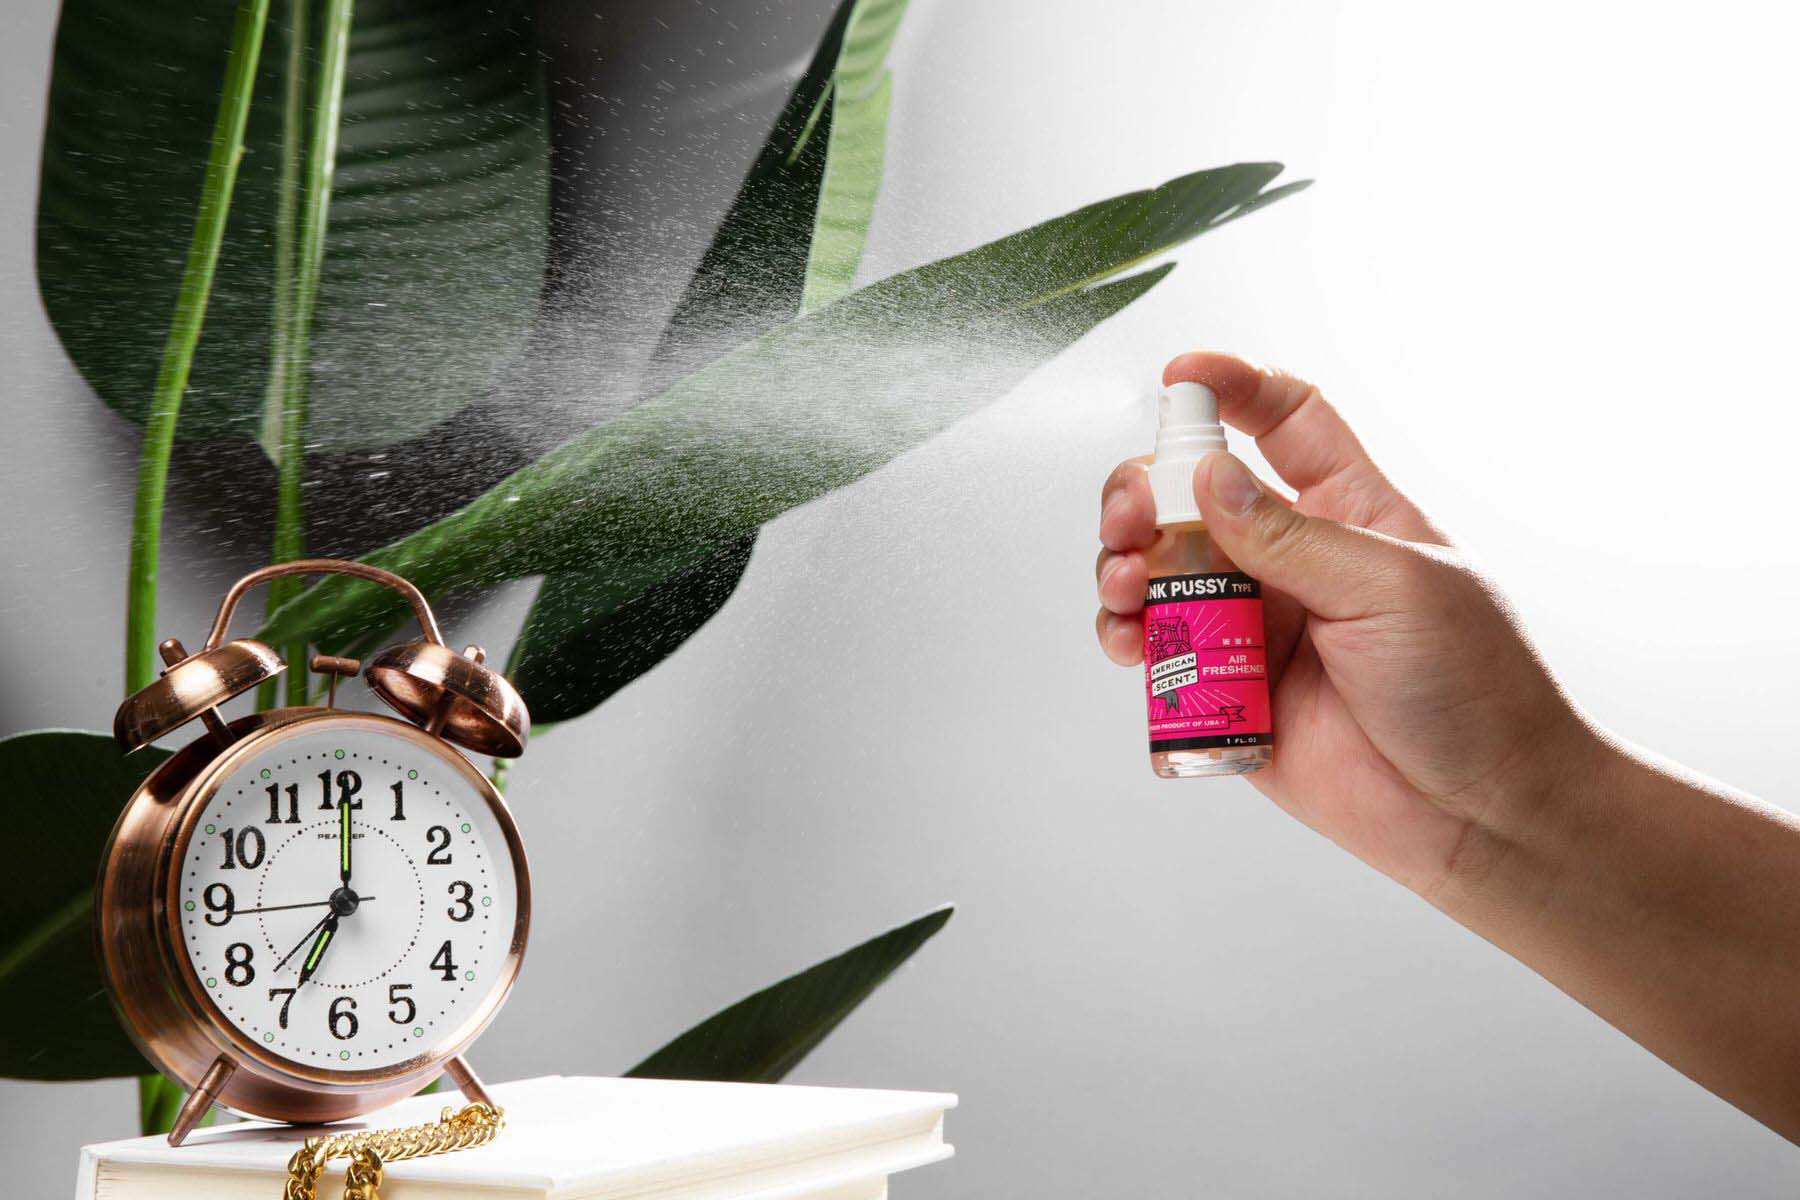
Not only does adding shadows make your picture look more natural, as though the shopper could reach through the screen and touch your ice-cold soda or alluring face cream, but it also helps fill in any blank space and remove the “hovering effect” of objects sitting on a plain background.
The Game-Changing Free Image Resizer Your Business Needs
All right, now you know why you need to incorporate an image resizer into your ecommerce media editing process stat. But where can you find one … and more importantly, where can you find one that won’t break the bank?
Sure, programs like Photoshop do amazing work, but with stringent licensing rules and ever-increasing prices for the number of users, Adobe and similar products can quickly balloon out of your price range, especially if you’re a startup or otherwise working on a shoestring budget.
The answer is a free image resizer, and there’s nothing better than soona’s Image Resizer. It’s free for all soona users, and you can edit an unlimited number of photos without any cost whatsoever beyond the membership price you’re already paying.
In addition to an image resizer, explore all the Media Editor tools that let you remove the background of your images and adjust your images to custom HEX codes or colored backgrounds. Get started with Image Resizer, and check out all our new tools today!
Today’s consumer marketplace is rich in options. Organizations rely not on true innovation every other second – who could possibly keep up that pace? – but on providing better versions of a particular product than their competitors or than that they previously offered.
The trick is catching a prospect’s attention long enough to convince them of this.
In such a jostling milieu, first impressions are everything. Bright, beautiful images that convey the impact of your brand are paramount to that good impression and effective PR. Hence, any image or graphic that loads slowly, is pixelated, is of poor quality, or isn’t adapted to mobile devices will work against you.
Welcome to image resizing, making sure that every lifestyle photo, behind-the-scenes shot, or foodie image is crisp, clear, and perfect for the device on which it is rendered.
But easier said than done, right? That’s where an image resizer comes in, helping to transform a single photo appropriate for one social media or ecommerce platform (or one device type) into one that works for every conceivable channel. Any organization aiming for a truly omnichannel approach – and any organization should aim for exactly that! – will find a free image resizer to be an invaluable tool.
In today’s post, we’ll discuss what an image resizer is, why it matters, how to resize an image, and what specs to use when doing so. Lastly, we’ll take a look at the best image resizer tool on the market today and discuss how you can integrate it into your product photography plan for best results.
What Is an Image Resizer?
An image resizer is a tool that allows you to adjust the size of your photo or graphic upwards or downwards to fit the requirements of a particular platform, social media channel, or device. A good image resizer will also help you crop the photo without losing any of the elements that matter.
To a certain extent, this depends on the photo or graphic itself. That’s why it’s important to have a lot of background or negative space in a product photo or behind a model, so you can afford to adjust where needed.
Finding it hard to visualize this? Consider a photograph of a model that puts the person in the middle third of a landscape photo, with beautiful but nonessential elements in the background – curtains, say, or trees that are out of focus. This image can now be sharply cropped in a vertical position for social media and phones, or left as a large landscape photo for a video or presentation.
Let’s say you don’t have enough background for that, though. You could use another image enhancement tool to crop out the background and replace it, blur it and merge it with another photo, extend it using AI tools, or otherwise transform it before then performing the resizing and crop services you need.
In a nutshell, an image resizer changes the size and dimensions of a photo, but also plays very well with a raft of other photo editing tools that take your images to the next level.
Why Image Resizing?
Before we discuss how to resize an image or where to find a free image resizer, we must first ask: Why does image resizing really matter? And does it have to be a whole song and dance? Can’t you just crop a photo a bit and be done with it?
{{resizer-ad="/external-components"}}
Well, yes and no. While much of your product photography might be easy to doctor before uploading to the web, you will run into challenges if you don’t have a streamlined, intentional approach. For instance:
- What do you do when you need a photo to shine in an email so you don’t want to cut it down, but you need it small enough that the email will send and load quickly?
- When you have an omnichannel campaign but the involved channels have very different image size requirements (think mobile, which is vertical, and YouTube, which is horizontal), how do you stay true to the image?
- What happens if you need to make a photo or graphic larger without losing quality?
Any of these situations is where an image resizer can help. Let’s take a look at some of the most basic use cases for resizing photos and graphics: boosting web performance, enabling online sharing, optimizing for mobile, meeting the requirements of specific channels, or upsizing where necessary.
Boost Web Performance
Large file sizes are one of the most common problems for websites. They render slowly, causing web pages to load at a glacial pace, which is irritating for shoppers and can cause them to bounce. If they can’t see your listings, why would they hang around?
Whether you’re trying to upload photos to an ecommerce giant like Amazon or Etsy, or are using them on your own site, it’s important they’re not too large. Even if they load quickly, the resizing algorithms native to ecommerce platforms may not edit your photos favorably, causing them to become grainy or blurred. That’s another good way to shoo your buyers away too soon, and no one wants that.
Even smartphones can take very large photos today, so comb through your media and make sure everything is the right size.
Enable Online Sharing
In addition to slowing down web performance, bloated photos inhibit quick sharing. Unfortunately, sharing is critical to a successful ecommerce business.
For instance, many businesses send regular emails to their customers with links to purchase. When those photos load slowly in the email body, customers aren’t impressed. Other businesses send media to collaborators or influencers, and it better come through crisp and clean, or they won’t want to work with you again.
Again, the solution to this is resizing the image so that it meets the specs for its intended use and comes through quickly.
Optimize for Mobile
Images on mobile are different than on desktop. The size requirements of tablets and phones mean you cannot simply upload a square or landscape photo that would look good on a desktop and be done.
Crop to Meet Channel-Specific Requirements
Social platforms and ecommerce platforms have specific image size requirements. If you want your products to stand out on Amazon, for instance, then they need to be sized to fit the thumbnails and display photos without any weird stretching, cropping, or blank space.
Therefore, it’s important to edit your photos to meet the specifications of the device and the ecommerce platform app or responsive desktop application you’re running on it.
Upsize Where Necessary
Upsizing is what it sounds like: making an image larger. However, what isn’t included in the name? That you must do so without losing quality.
When it comes to vector graphics, this is easy. A vector is a digital element that can be increased forever (or to the limits of the graphic design program in which it was created) without losing resolution. If you want to make the image bigger, then all you have to do is go into the program, increase the size of the artboard, select all, and increase the size of the objects rendered there.
Et voilà: bigger image with no loss of quality.
Raster images, however, are different. They are pixel-based, which means ultimately if you zoom in far enough, you will start to see the little boxes of different colors that make up the image. If you want to use a photograph that is 800 pixels wide in a desktop display that is 2,000 pixels wide, the result will be grainier than undercooked cornbread.
The answer is upsizing. Instead of just stretching the image to fit the space (which causes the rendering device to simply blow up the pixels and create larger blocks of color), you essentially rebuild it using the original shapes and colors of the photo, filling in the pixels to create a larger version of the original.
This is, as you might imagine, very difficult for a human to do pixel by pixel. It is, however, much easier for an AI to do – and luckily, there’s an AI for that! We’ll discuss it more below.
Before we do, though, let’s consider the individual image sizes called for by platform and channel. Knowing what they are and where to find them can dramatically improve the quality of your product photos – and your marketing success overall.
The Complete Guide to Online Image Sizes
There are some basic sizing guidelines for desktop and mobile. For instance, your image should be at least 1,500 pixels for desktop, though a higher-resolution photo or graphic (more like 3,000 pixels) is better for high-resolution displays. Typical ratios for a full-screen image are 4:3 or 16:9.
On mobile, images are vertical rather than the standard horizontal desktop display. The basic display ratio for today’s phones is 9x16, though 3:4 is typically still an acceptable size for social platforms. As for pixels, 1080x1920 pixels is a common image size, though some sources recommend a minimum of 1,680 in width and 3,000 in height.
These are, unfortunately, only the loosest of guidelines. That’s where specific guides come in.
Know Your Image Specs
Each platform has different size requirements. Some of these are relatively similar, such as TikTok and Instagram, the content for which is made to be consumed on a phone.
Others are quite different. Most platforms even have different image requirements within them, depending what type of media it is, whether it’s an ad, where it will be rendered, and so on. Suffice it to say, painstakingly googling each dimension when you need to resize an image quickly becomes tiresome.
Accordingly, soona took a minute (okay, way more than a minute) to create detailed guides for different platforms, so you always know where to find them. Make sure to bookmark these pages so you can reference them wherever needed.
Social media guides include:
Guides for the major ecommerce platforms include:
Again, remember to save these somewhere handy so you can access them any time, for any purpose. Scroll through each of them until you find the exact use case you’re looking for (e.g. the correct pin size for a recipe or the exact size for a Facebook column ad) to make sure you get it right!
That said, exactly how can you edit images for ecommerce listings? Let’s take a look now.
How to Edit an Image for Ecommerce Listings
Theoretically, you could laboriously resize each image for each platform, device, and use case. If so, you’d better have a pretty amazing budget, because given even a moderate amount of collateral, that could comprise full-time work for an employee – or more than one.
The much better approach is to use a free image resizer that will help you adjust media as needed. Once you’ve done so – say, resized a particular product photo for Amazon or Shopify – you can file it in a digital asset management tool, discussed below.
Why is it important to resize your photos for ecommerce listings? Because each platform has its own specifications and ways of rendering media, which means what works for one will not look good for the other, and vice versa. If you want your carefully curated images to shine, you need to size them appropriately – and then add in other editing steps as necessary.
We have discussed some of this above (such as upsizing and removing backgrounds), but we will go into more detail here.
Scaling Down
Perhaps the most common resizing move is to scale an image down. If you simply upload the image, the system will compress it to fit in the space. When you crunch 4,000 pixels into a space 1,000 pixels wide, the result is a blurry mess.
Scaling samples the image, decides what the most salient elements are, and recombines the colors and shapes to recreate the image at a smaller scale with fewer overall pixels. That means when the image loads in its 1,000-pixel space, it will be the right resolution.
Cropping
Cropping is when you shave pixels off the vertical or horizontal – or both – sides of a photo or graphic. It is often necessary to get the image to fit into its designated space.
Upsize
The number of pixels per inch, or density, is what determines how crisp an image is. Consider the opposite situation from scaling down, where you need a smaller image to fit a large space without stretching out weirdly. You can’t simply blow it up, because that means the pixels become larger chunks of the same color at reduced resolution.
Instead, you’ll need an intelligent graphic design tool, which samples the image in the same way as when scaling down. Then it expands the image, filling in pixels at the correct density – and therefore adding significantly more pixels than were in the original.
By using AI tools, you can ensure a crisp result that looks like it was taken at higher resolution rather than stretched out. It will take those formerly large blocks of a single color and fill them in with different colors at the same level of refinement.
Edit Background
One thing that helps resize an image is to have flexibility with the background. If yours is too limiting, you can simply remove it and then change it to whatever you like, be that another photo, black, white, or a color.
Gradients are another nice way to add visual appeal without having to add a real background. They bring immediacy to the photo and make it stand out, so they’re perfect for filling in background space when you don’t want to add text or other elements.
Add Shadows
Adding shadows is another way to edit a photo. While this isn’t technically necessary for resizing, it can help if you have added a plain color background as a means to an end when changing the dimensions of your photos.
Not only does adding shadows make your picture look more natural, as though the shopper could reach through the screen and touch your ice-cold soda or alluring face cream, but it also helps fill in any blank space and remove the “hovering effect” of objects sitting on a plain background.
The Game-Changing Free Image Resizer Your Business Needs
All right, now you know why you need to incorporate an image resizer into your ecommerce media editing process stat. But where can you find one … and more importantly, where can you find one that won’t break the bank?
Sure, programs like Photoshop do amazing work, but with stringent licensing rules and ever-increasing prices for the number of users, Adobe and similar products can quickly balloon out of your price range, especially if you’re a startup or otherwise working on a shoestring budget.
The answer is a free image resizer, and there’s nothing better than soona’s Image Resizer. It’s free for all soona users, and you can edit an unlimited number of photos without any cost whatsoever beyond the membership price you’re already paying.
In addition to an image resizer, explore all the Media Editor tools that let you remove the background of your images and adjust your images to custom HEX codes or colored backgrounds. Get started with Image Resizer, and check out all our new tools today!


